In the Windows 11 operating system, Microsoft has announced a feature that enables users to run the Andriod application on the Windows system. This is done through Windows Subsystem for Android (WSA) which is similar to the Windows Subsystem for Linux that the company introduced a few years ago for running Linux distros inside Windows OS.
When an Android application is running on Windows, the system automatically assigns a graphics processor for the apps. If the device has multiple graphics processors installed, then the Android apps can take advantage of that and users can specify any of the installed GPU to be used by the Android apps.
In this step-by-step guide, we will show you how a specific graphics processor or GPU can be assigned for the Windows Subsystem for Android (WSA) in Windows 11 operating system quickly and easily through the Settings app.
How to assign default GPU in Windows Subsystem for Android in Windows 11
Step 1: Open the Windows Subsystem for Android on your computer. For this, click on the Start Menu and search for “Windows Subsystem for Android” and from the search results, click on the application to open it.
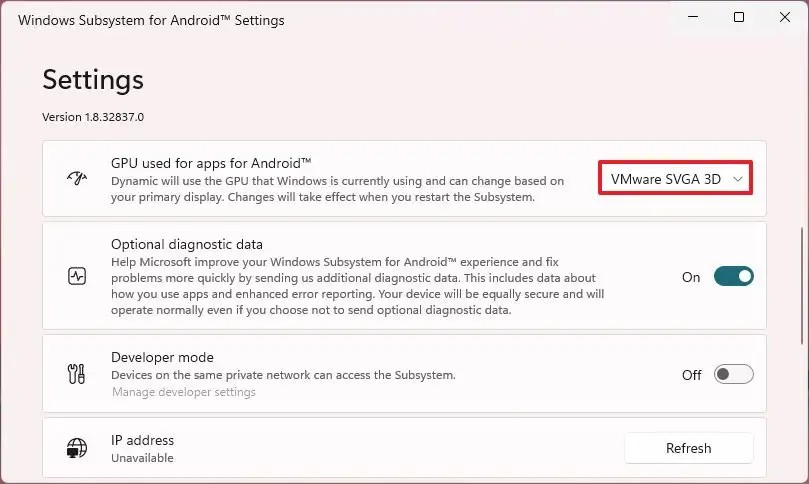
Step 2: Under the “GPU used for apps for Android” section, select the GPU for apps running on WSA from the drop-down list.

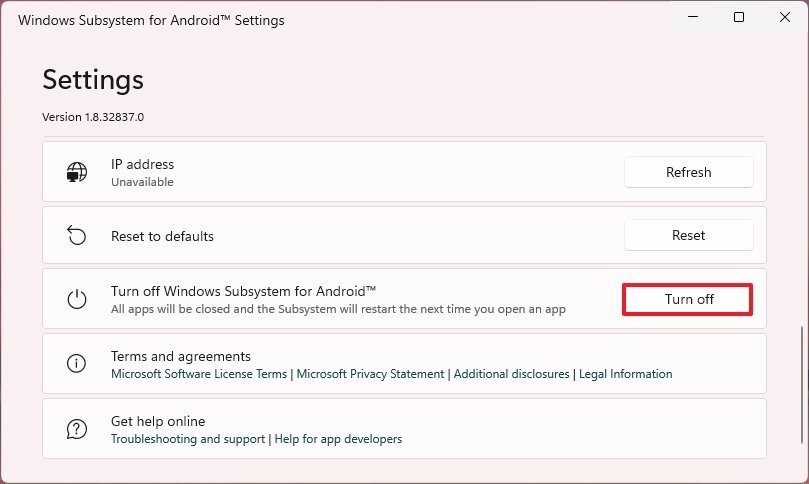
Step 3: After that, under the “Windows Subsystem for Android” settings, click the “Turn Off” button and then again click the “Turn On” button.

That’s it. Once you have successfully completed all the steps mentioned above, the Android applications running on your Windows 11 computer will be using the graphics card or processor that you have specified in the Settings.

