Apple iPhone series received the new iOS 15 update last year with some major changes to the user interface and several new features for the users. One of the features that didn’t receive much attention is the introduction of Legacy Contacts on the iPhone.
The feature which actually arrived with the iOS 15.2 version, is claimed by the company as the easiest and the most secure way to give someone access to the data stored on the Apple account.
Basically, the user can set up a trusted contact that can access any of the data that have been stored on the Apple account in the event that they pass away. The user can also add multiple contacts of friends and family members for this feature.
In this step-by-step guide, we will show you how to set up legacy contacts on your Apple iPhone running the latest iOS 15.2 or newer version of the operating system.

How to set up Legacy Contacts on your Apple iPhone
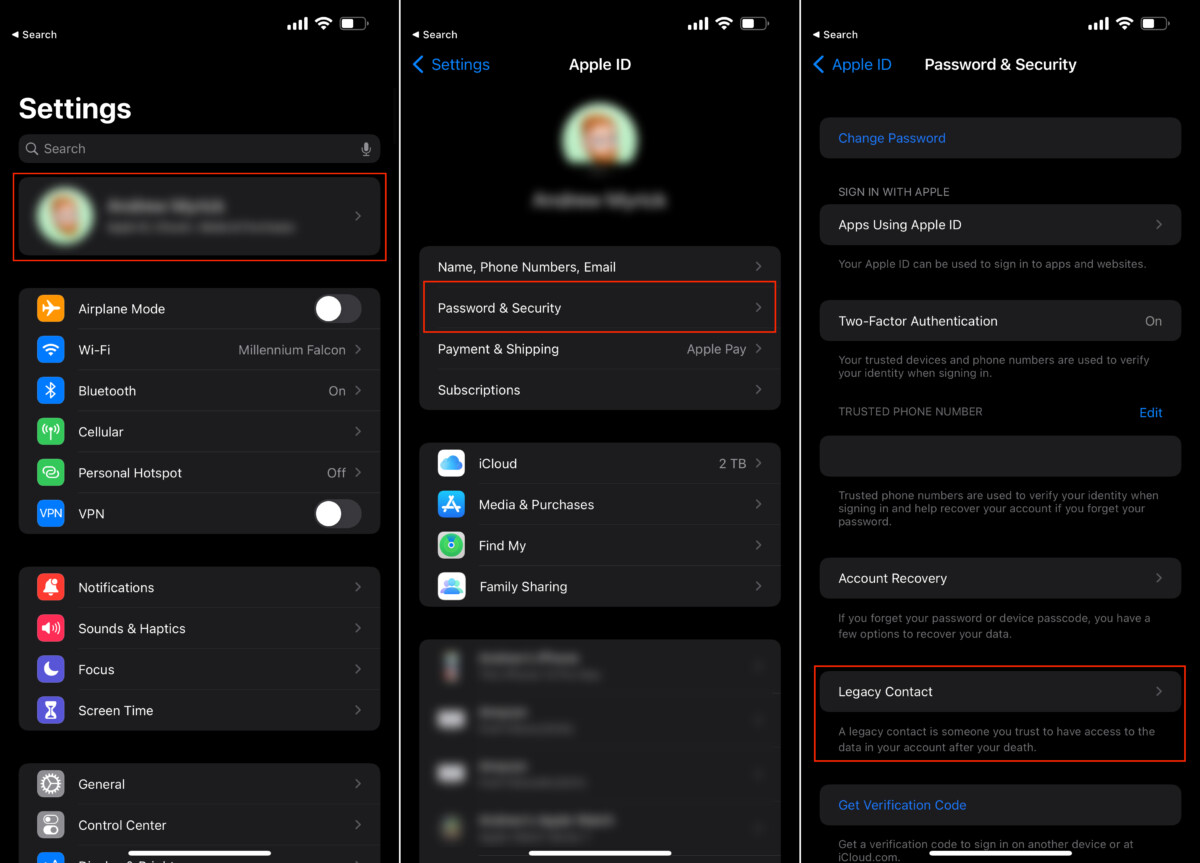
Step 1: Open the Settings application on your Apple iPhone.
Step 2: When the Settings app opens, tap your name at the top of the page.
Step 3: After that, tap on the “Password & Security” option from the list.
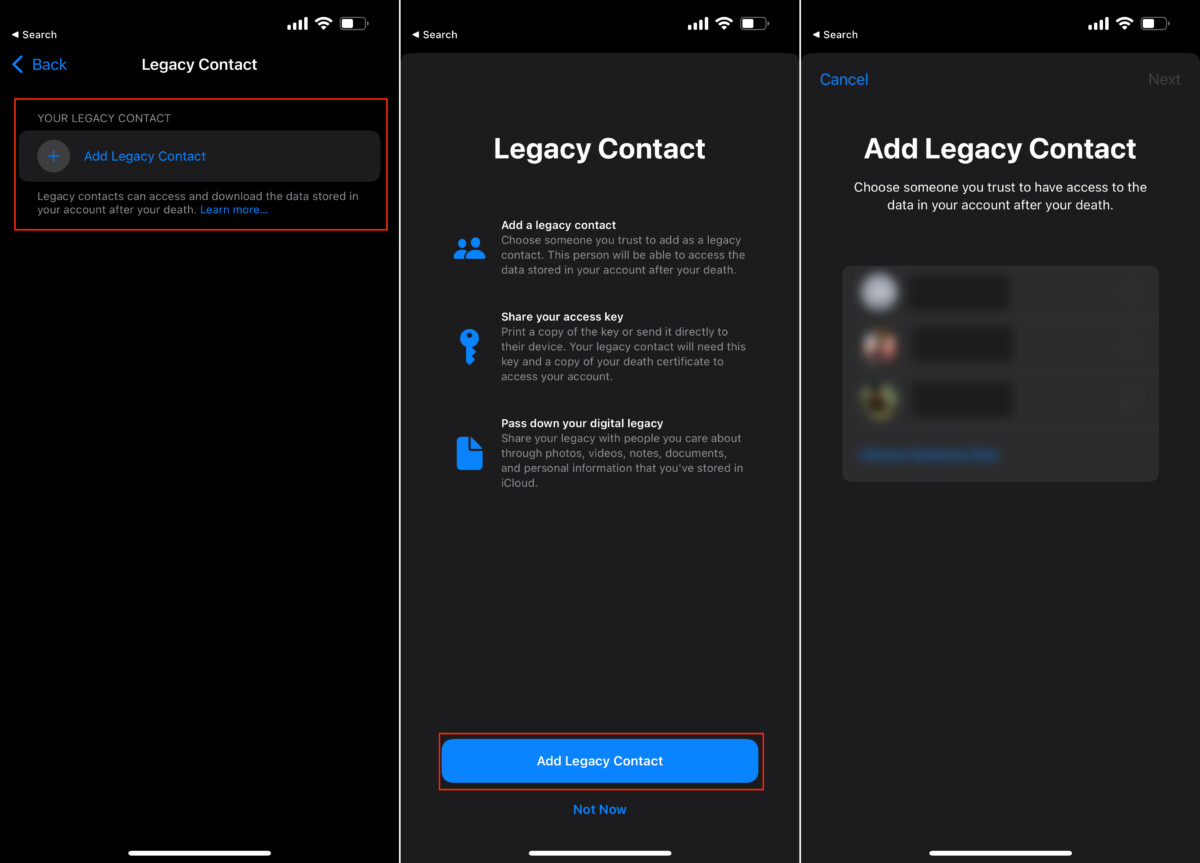
Step 4: Select the “Legacy Contact” option and then tap on the “Add Legacy Contact” button.
Step 5: Tap the button again to confirm and then enter the passcode if prompted.
Step 6: Select someone from your list of contacts by tapping the email or phone number.
Step 7: After that, tap on “Continue” and select any of the two options presented — Send a Message or Print a Copy. Once done, tap on the “Done” button.


That’s it. If you have followed the above-mentioned step-by-step guide, then you have successfully set up Legacy Contact on your Apple iPhone. If you want to have multiple legacy contacts on your Apple ID, then you will need to repeat this guide each time for adding additional contacts.

