If you are using Windows 10, then Photos is the default application for viewing pictures and videos on your computer that are stored locally or on the cloud using the Microsoft OneDrive.
The Photos app comes with basic features such as viewing and organizing photos as well as the ability to edit them. However, by default, the app only shows media content stored in the Pictures folder on your computer.
In this step-by-step guide, we will show you how you can add more source locations or folders in the Photos app on your Windows 10 system.
How to add a folder to Photos in Windows 10
Step 1: First of all, open the Photos app on your computer.
Step 2: Now, click on the menu icon in the top-left corner of the Photos app and from the drop-down list, click on the “Settings” option.
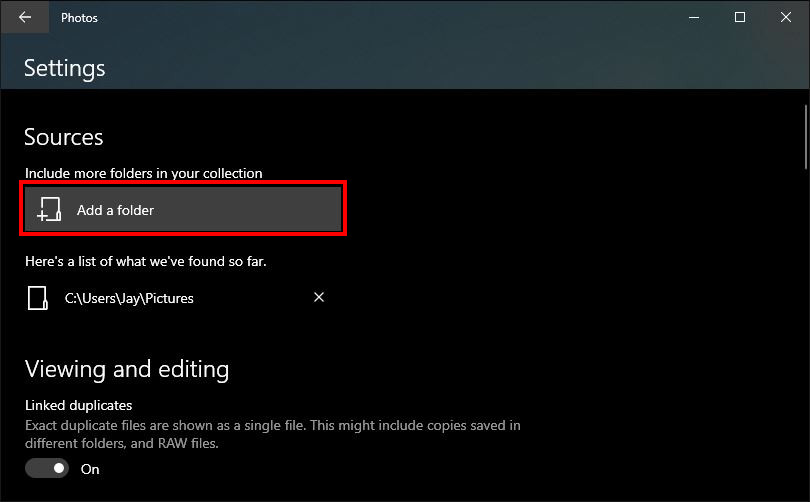
Step 3: In the Settings window that opens, click on the “Add a folder” button under the Sources section.

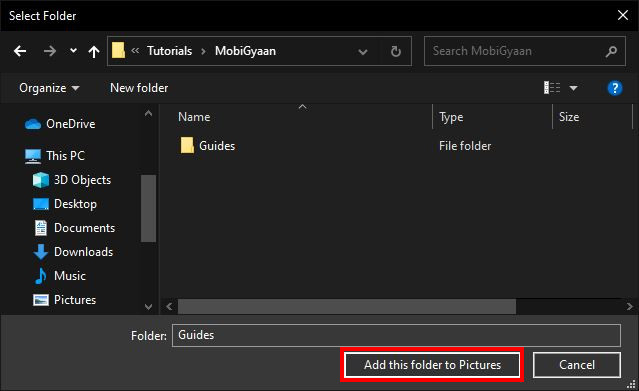
Step 4: Browse to the folder that you want to add and once you have found the folder, click on the “Add this folder to pictures” button.

As soon as you complete these steps, the new location will be added to the Photos app and it will also start indexing images. To add more folders, you can keep following the above-mentioned steps for each new location.

![How to enable Xbox Game Bar using Xbox Controller [Windows 10] 3 Xbox Controller Featured](https://www.mobigyaan.com/wp-content/uploads/2020/08/xbox-controller-windows.jpg)