The Autocorrect feature can be useful in Windows 11 since it corrects words and spellings when you make mistakes while typing, but sometimes it may be annoying as well. If the autocorrect isn’t working out for you, you can turn off autocorrect in Windows 11 with a simple method. Here’s how.

Windows 11 includes a spell-checking feature for when you type words anywhere in Windows 11. It can be helpful when you make mistakes while typing, but it may also give you inaccurate results eventually changing the meaning of what you have typed. This quick tutorial will show you how to turn off autocorrect in Windows 11.
How to turn off autocorrect in Windows 11
- Step 1: Open Windows Settings by pressing the keyboard shortcut Windows Key + I. You can also use the Windows Start button in the Taskbar and type Settings.
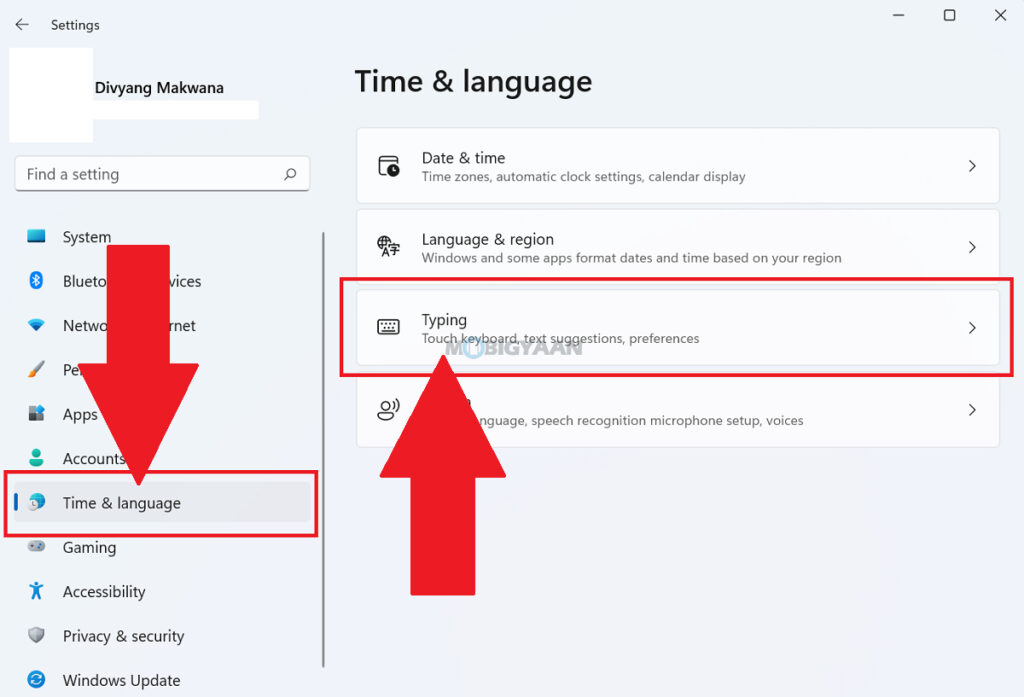
- Step 2: On the left side, click on Time & language and click Typing on the right.

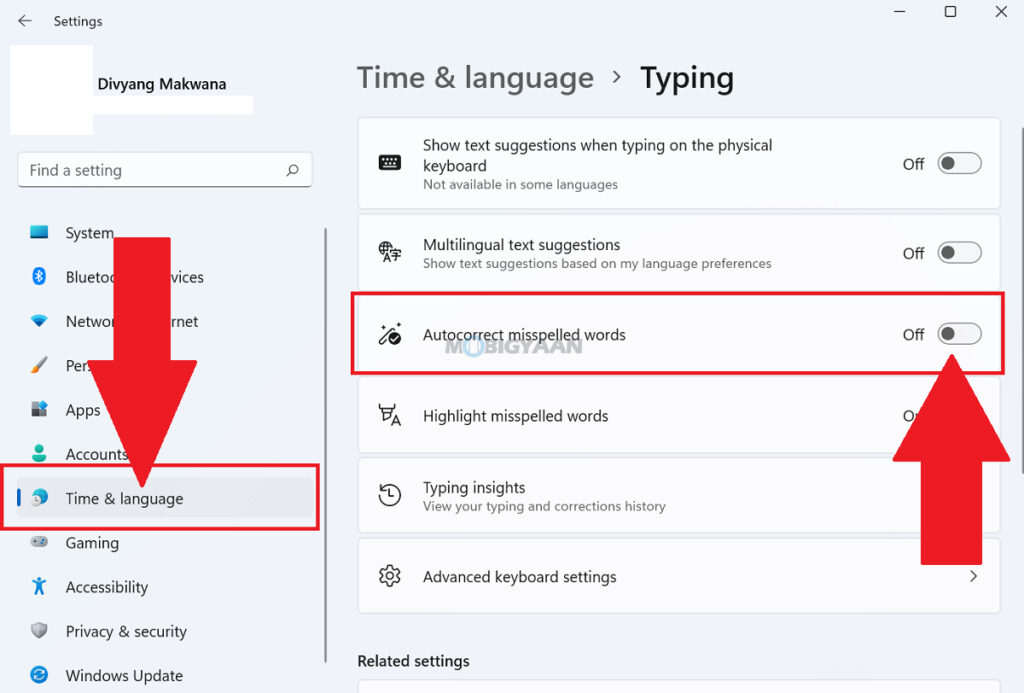
- Step 3: You will see a slider that says Autocorrect misspelled words, turn it off.
Once done, close the window. Whenever you type in Windows 11, the autocorrect won’t correct the misspelled words. Now you know how to turn off autocorrect in Windows 11.

If you are an Android user and facing a similar issue while typing, you can also disable autocorrect on Android easily, take a look at it here.
Like this post? Browse more content like this in our How-To Guides section. Take a look at some suggested guides for Windows 11.
- How to move icons on the left side in Taskbar [Windows 11]
- How to always show the touch keyboard icon in Windows 11
- How to show file extensions in Windows 11
- How to automatically hide Taskbar in Windows 11
- How to set lock screen timeout in Windows 11
To get updates on the latest tech news, smartphones, and gadgets, make sure you follow us on our social media profiles.

