By default, your Windows 11 lock screen turns off automatically after a few minutes, but you can change it as per your needs, let’s say you want to keep the lock screen for a longer duration or maybe you are a laptop user and want a shorter duration to the extent the battery life. Whatever the reasons, you can easily set lock screen timeout in Windows 11. Here’s how.
How to set lock screen timeout in Windows 11
Follow these easy steps to set lock screen timeout in Windows 11.
- Step 1: Launch Windows Settings using the keyboard shortcut Windows + I or you can use the Windows Start button.
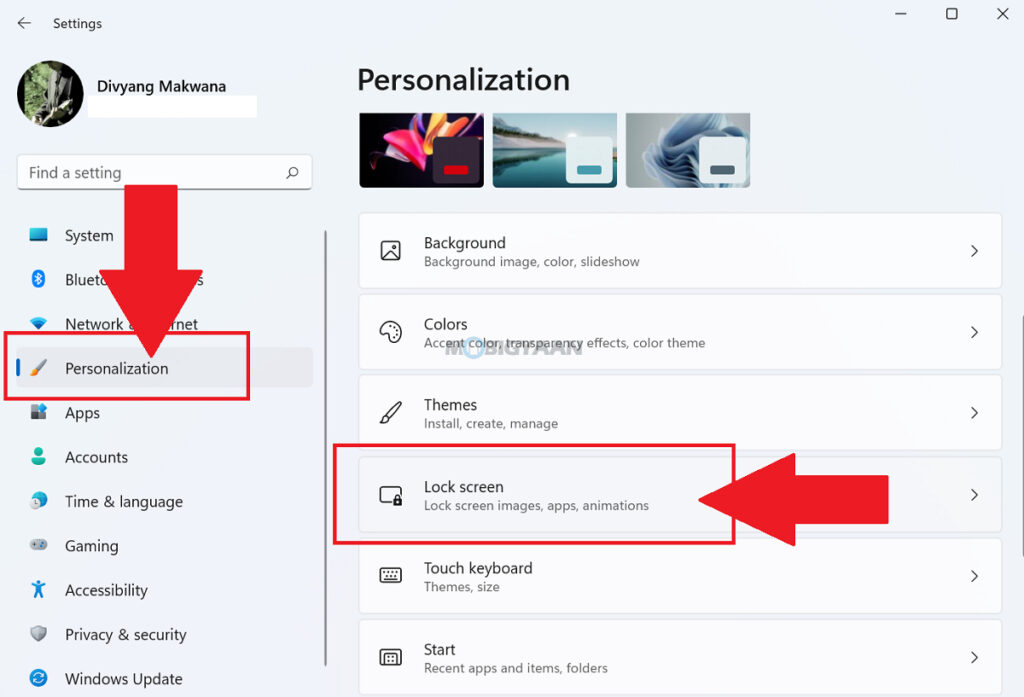
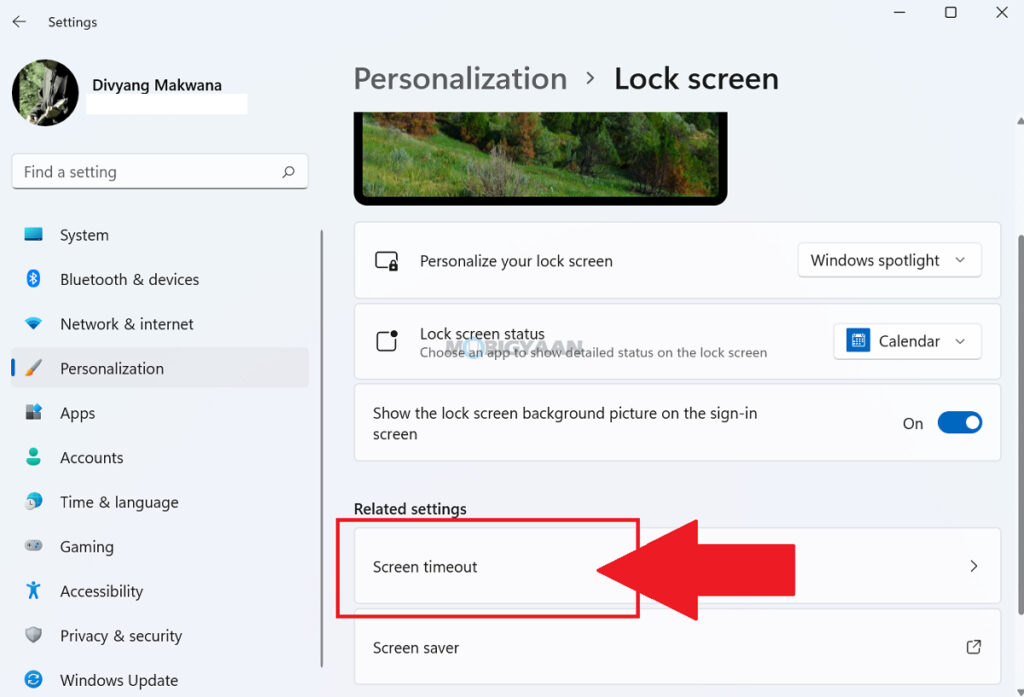
- Step 2: Once you are in the Windows Settings, click on Personalization on the left and then Lock screen on the right side. Click on Screen timeout under Related settings.
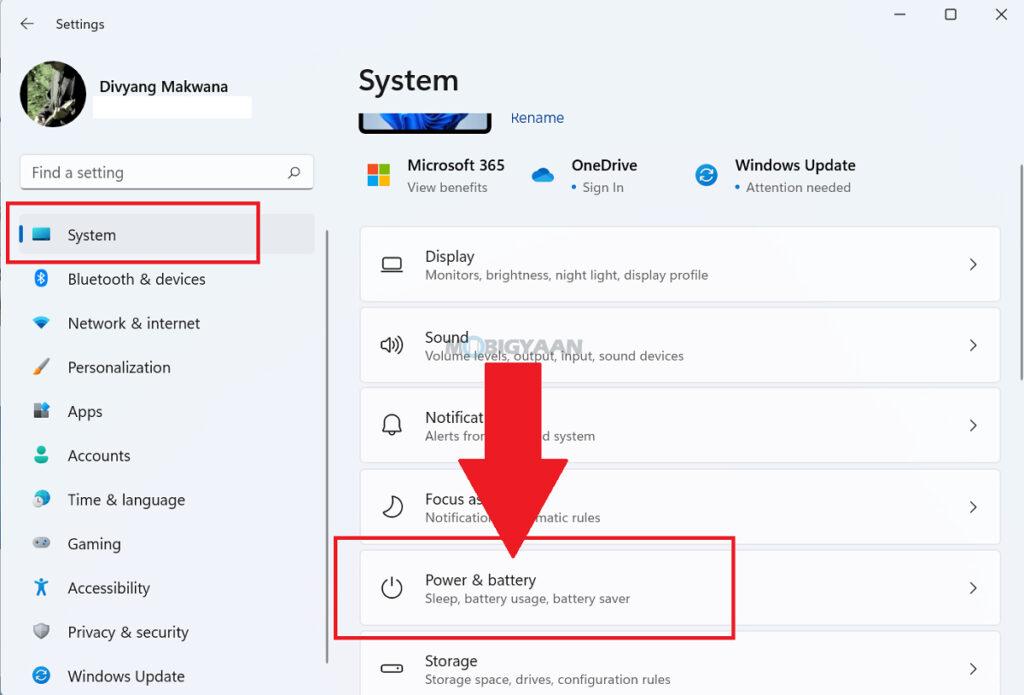
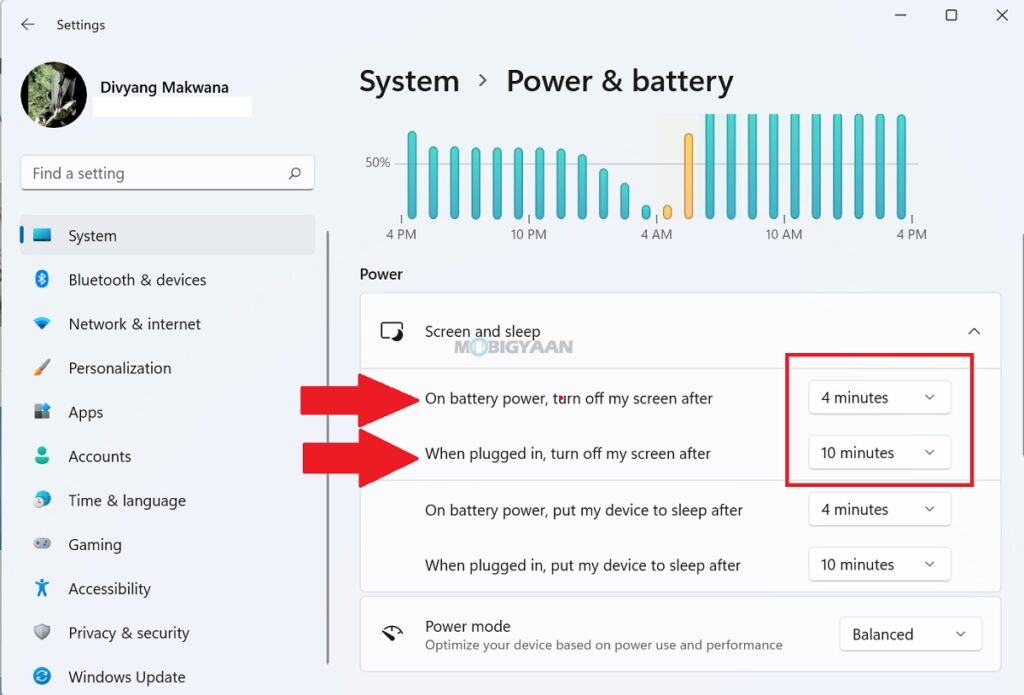
Alternatively, you can also go to System -> Power & battery to jump directly to the screen timeout settings.
- Step 3: Now change the timers for these two options – On battery power, turn off my screen after & When plugged in battery power, turn off my screen after. The default is 4 minutes and 10 minutes, you can increase or decrease the timers as per your requirements.
You can also change the sleep timers for your device just below the options. This is how you can set lock screen timeout.
Note: Other than the lock screen, this setting also applies when your system is idle and logged in, the display will be turned off automatically according to the time you have set.
Want more content like this? Here are some suggested guides for Windows 11, check them out below.
- How to always show touch keyboard icon in Windows 11
- How to show file extensions in Windows 11
- How to quickly stop apps from starting up with Windows 11
- How to update Audio Drivers on Windows 11
- How to remove or uninstall graphics drivers in Windows 11
More such guides are available in our How-To Guides section. To get updates on the latest tech news, smartphones, and gadgets, make sure you follow us on our social media profiles.
