The newer version of the Windows operating system, including the Windows 10 and Windows 11 comes with several new features and one of them is the tool that tracks or monitors the bandwidth on your computer.
The built-in bandwidth monitoring tool in the Windows 11 -powered computer enables users to check the network data usage on the device for the last 30 days, that too on a per-network basis which is a really handy feature for many users.
In this step-by-step guide, we will show you how to quickly and easily check the network data usage on your Windows 11 computer through the Settings application.
How to check Network Data Usage in Windows 11
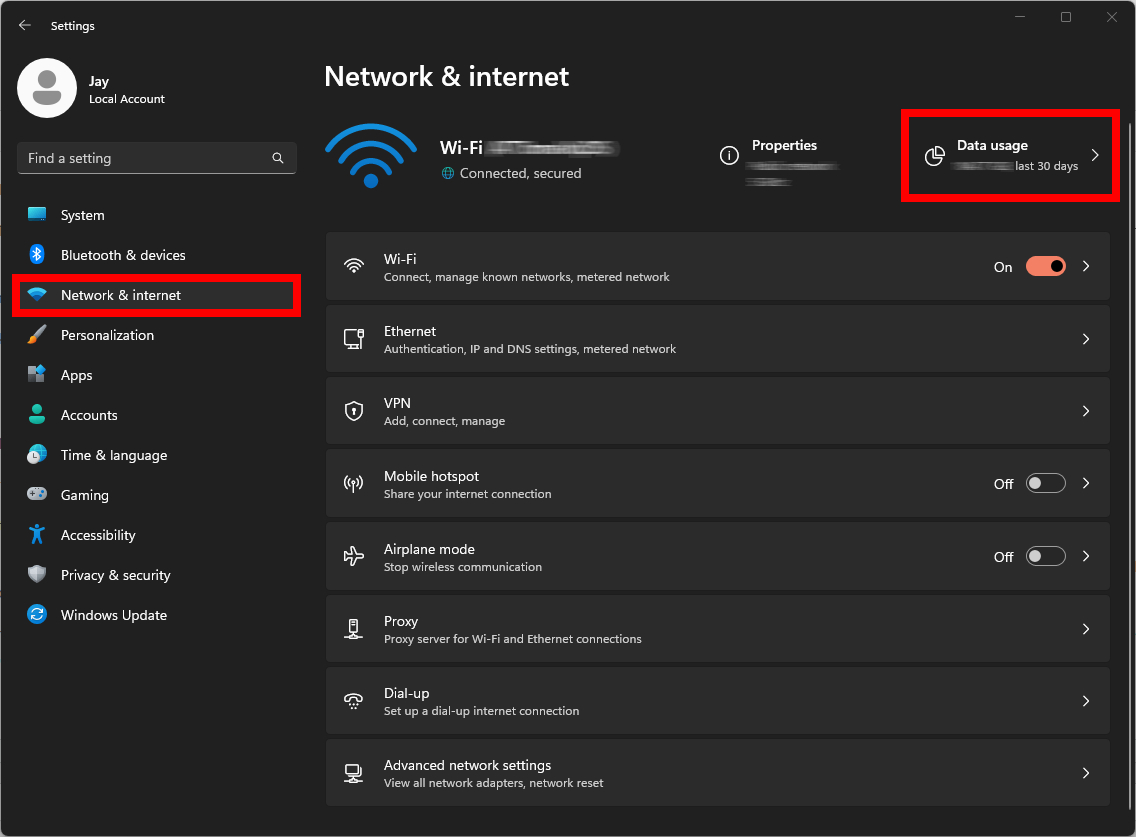
Step 1: Open the Settings application on your Windows 11 computer.
Step 2: When the app launches, select the “Network & Internet” option from the left sidebar.

Step 3: After that, click on the “Data usage” button from the right-side pane.

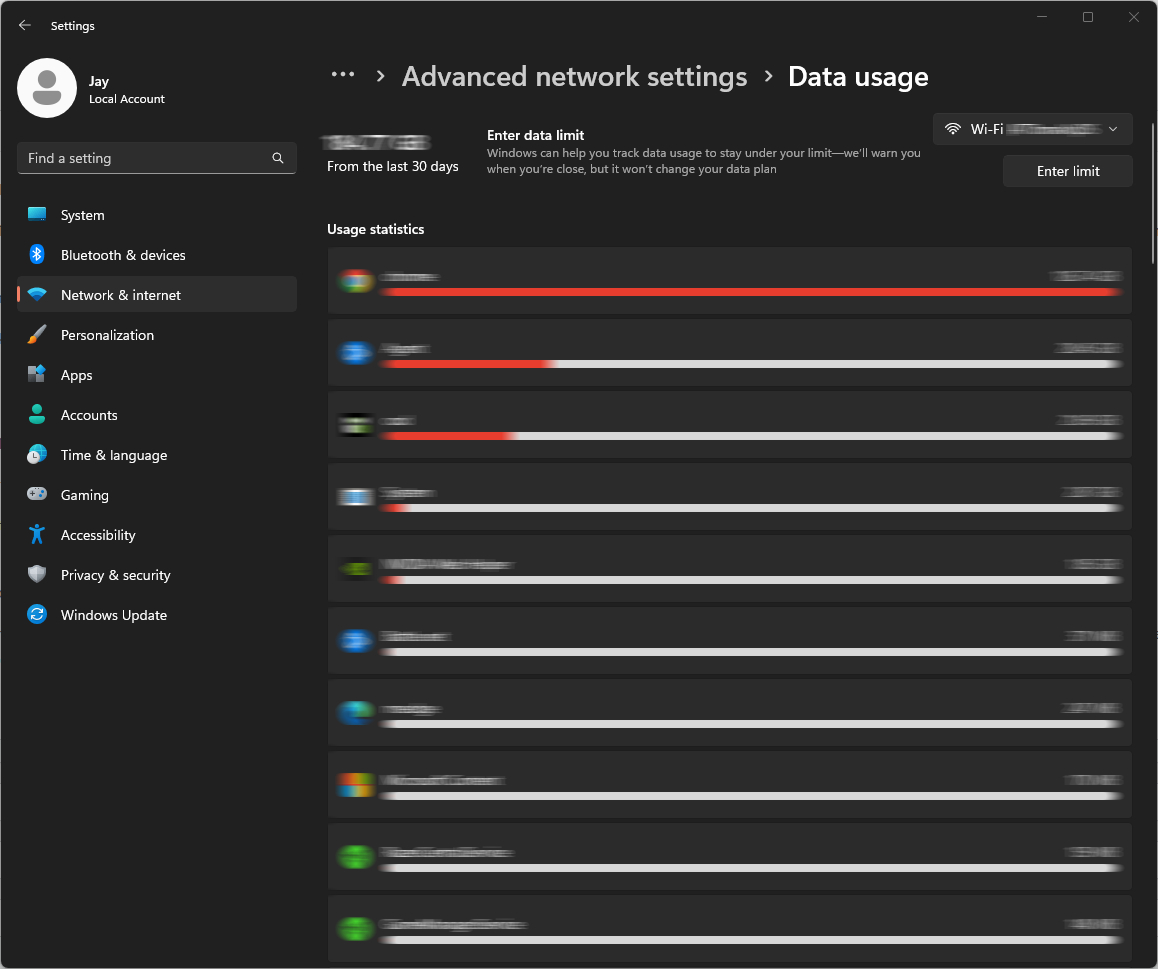
That’s it. The screen that opens on your device will show the overall network usage at the top while the breakdown of network data usage per application will be shown below it. This is the most easiest and simplest way to check the network data usage on your Windows 11-powered computer. Do note that the usage shown is only related to your computer and not the overall network.
The feature comes in handy if you are on a metered internet plan and want to see which application takes up most of the bandwidth. If you are on a metered network, then its a good idea to set up metered connection for the specified network to ensure that the device doesn’t cross the set bandwidth limit.

