The Windows 11 operating system comes with several options for the users to customize the computer based on their usage and requirements, ranging from simple stuff to some advanced functions.
One of the advanced features supported by the Windows 11 operating system is the ability for the users to create a custom power plan to manage how the computer utilizes the power by configuring specific hardware and system options such as brightness and sleep settings.
By default, the operating system comes with three schemes or plans — Balanced, Power Saver, and High Performance, making the system perform similarly to the plan’s name. If you are looking for a custom power plan, then you can easily do that in the Windows operating system.
In this step-by-step guide, we will show you how to create a new custom power plan in the Windows 11 operating system to customize the power utilization on your computer based on your requirements.
How to create a new power plan in Windows 11
Step 1: Open the Control Panel on your computer. For this, search for Control Panel in the Start Menu and select the application from the search results.
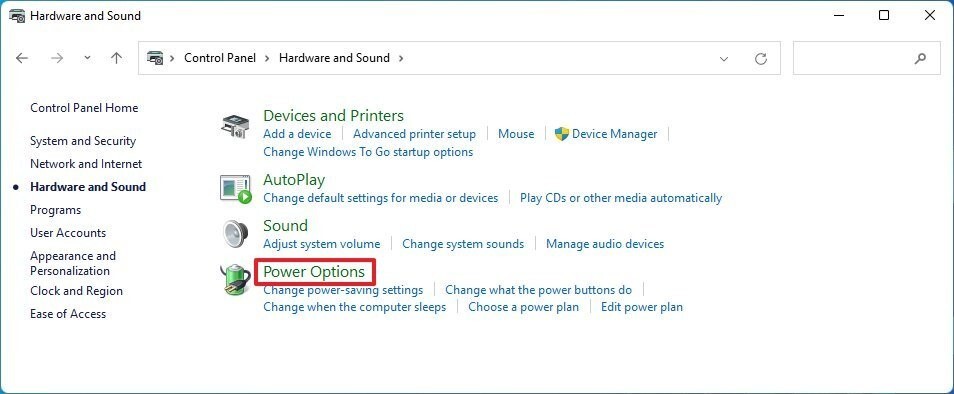
Step 2: When the Control Panel opens, click on the “Hardware and Sound” option.
Step 3: Under the Hardware and Sound settings page, select the “Power Options” from the list.

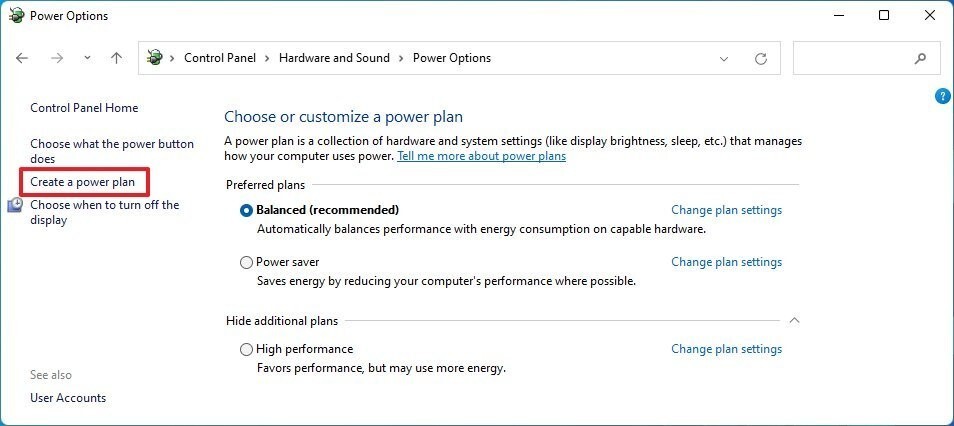
Step 4: After that, click on the “Create a power plan” from the left sidebar.

Step 5: Select the base power plan and then add a name for the new power scheme and click the “Next” button.
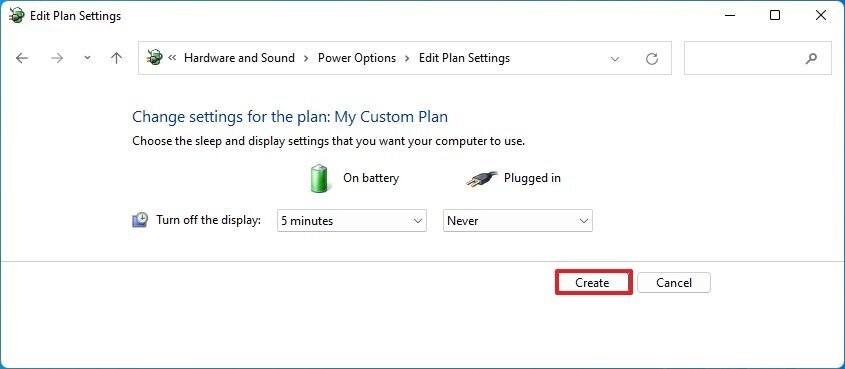
Step 6: Then, select when the device should turn off the display and when it should go to sleep.
Step 7: Once the selection is completed, click on the “Create” button.

That’s it. After following the above-mentioned step-by-step process, you have created a new power plan on your Windows 11 computer, and you can proceed to adjust the settings as per your requirements.
