Microsoft’s Windows operating system comes with PowerShell, which is a powerful command-line tool that allows users to customize settings on the device, including the advanced ones. It is basically a task automation and configuration management program from Microsoft.
For most of the commands, the program needs to be opened with administrator access, which is not enabled by default. To save you some time and extra steps, you can configure the application to open with administrator access by default.
This can be achieved through the Windows Terminal in a few simple steps but make sure that your computer has the Windows Terminal version 1.13 or newer. There are a few different ways to achieve this functionality but we will be sticking with the Terminal app this time.
In this step-by-step guide, we will show you how you can always open PowerShell with administrator access in Windows 11.
How to always open PowerShell as Administrator
Step 1: Open the Windows Terminal on your Windows 11 computer.
Step 2: When the app opens, click the menu button next to the new tab option and select the “Settings” option.
Step 3: Under the “Profiles” section, click on the “PowerShell” option.
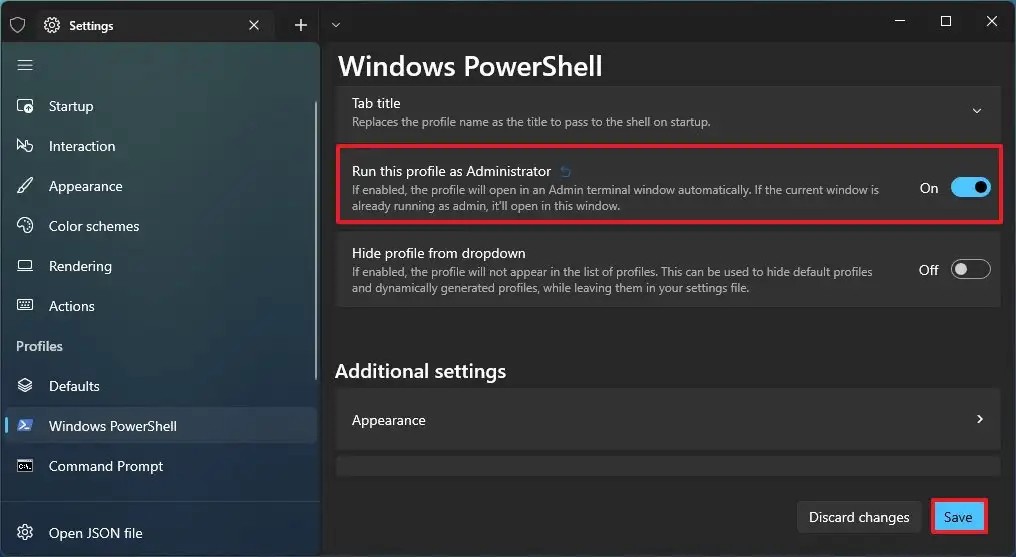
Step 4: After that, turn on the “Run this profile as Administrator” toggle switch to run PowerShell elevated automatically and click the “Save” button.

That’s it. Once you have successfully completed the above-mentioned steps, close the terminal window and whenever you reopen PowerShell, the console will automatically open as an administrator. However, you will still need to confirm the elevation like any other app.

