The Windows 11 operating system from Microsoft comes with several built-in features that many people are not aware of and one such feature is UAC or User Account Control, which is essentially a security-related feature.
It basically prevents any unauthorized changes from being made to the computer without the permission of the administrator or the owner of the computer. It gets triggered whenever a user, application, or service tries to make any certain change in files or settings on the computer.
When the action is triggered, a window will appear on the screen labeled as “User Account Control” with all the details about what changes are being made and asking permission from the administrator to proceed further.
There are a few different ways you can enable and configure the User Account Control feature on your computer but in this step-by-step guide, we will show you how to enable the UAC feature on Windows 11 PC using the Local Security Policy editor.
How to enable User Account Control in Windows 11
Step 1: Open the Local Security Policy application on your computer. For this, press the Windows + R keys on your keyboard, and in the Run window that opens, type “secpol.msc” and hit the Enter key.
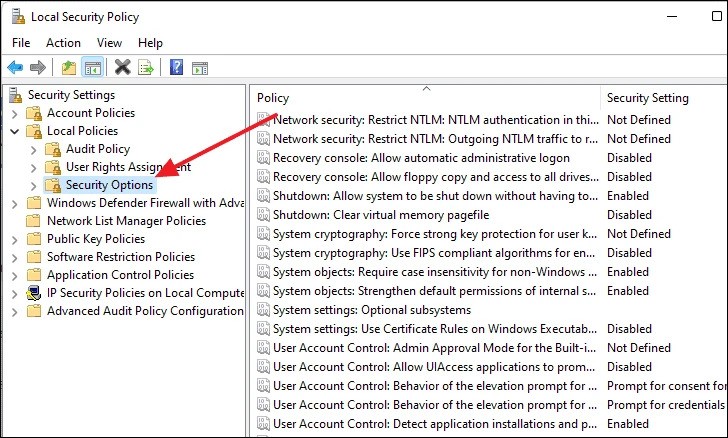
Step 2: When the Local Security Policy app opens, click on the “Local Policies” from the left-side pane and then select the “Security Options” folder.

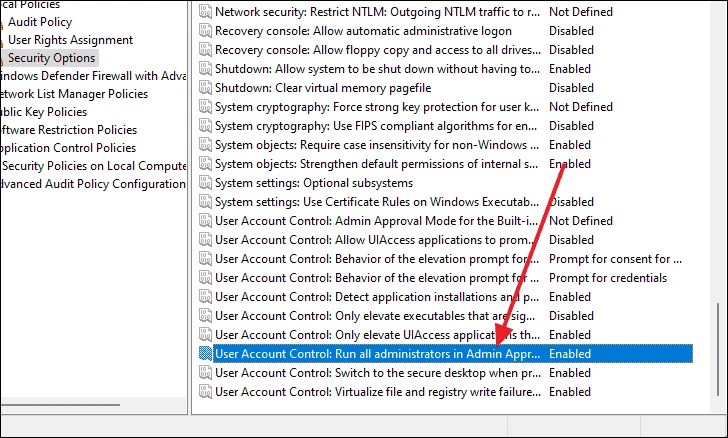
Step 3: Now, on the right side, scroll down and look for a policy named “User Access Control: Run all administrators in Admin Appr…” and then double-click on that policy.

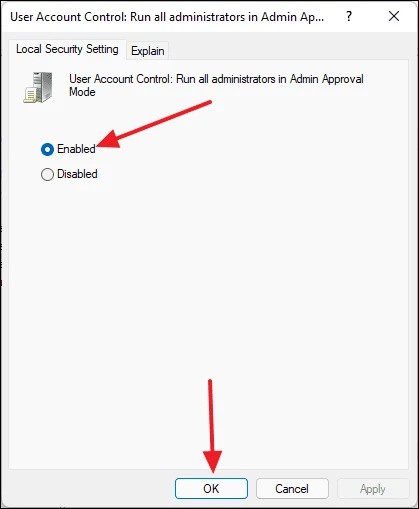
Step 4: When the new window opens up, click the “Enabled” radio button and then click on the “Ok” button.

That’s it. You have now successfully enabled the User Access Control feature on your Windows 11 computer. With UAC enabled, Windows 11 prompts for consent or prompts for credentials of a valid local administrator account before starting a program or task that requires full administrator access.

