The Windows operating system offers an option to set a password for the account which protects your computer from unauthorized access and protects you and your data from a privacy breach.
You will be asked to set a password at the time of setting up your Windows 11 system but you also have an option to skip it. If you have already set a password for the device and want to change it, then here is a step-by-step guide for the same.
How to Change the password for a Local Account in Windows 11
Step 1: Open the Settings application on your Windows 11 computer. For this, you can either search in the Start Menu or press the Windows + I keys on your keyboard and select “Settings” from the context menu.
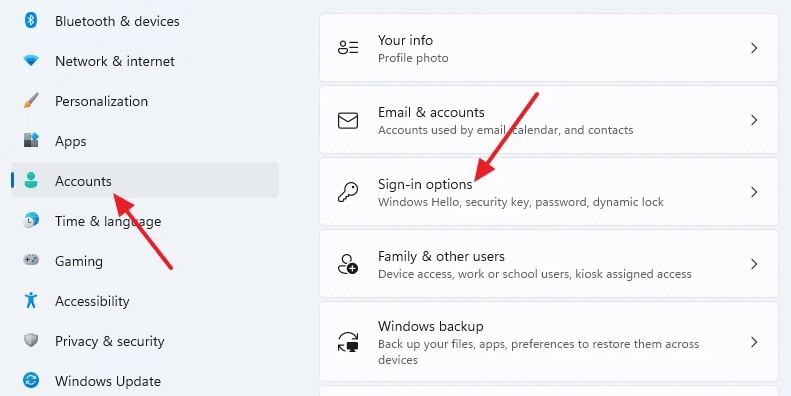
Step 2: When the Settings window opens, click on the “Accounts” option from the left-side pane and then from the right-side pane, select the “Sign-in options” item.
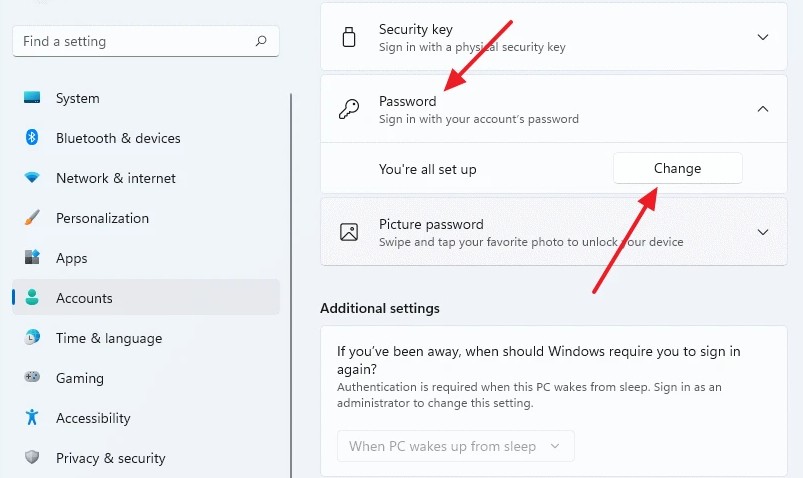
Step 3: After that, click on the “Password” under the “Ways to log in” section and click the “Change” button from the menu.
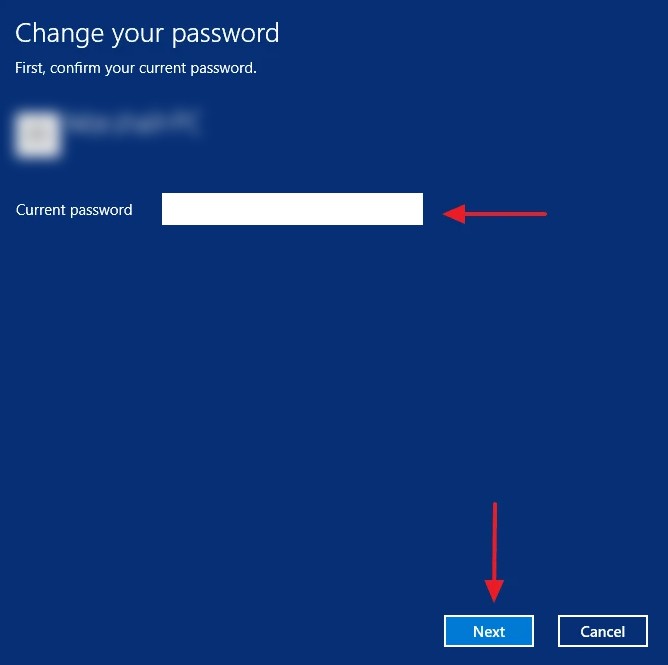
Step 4: Now, you will be asked to enter the current password. Press the “Next” button after that which will then ask to enter the new password in the “New Password” and “Confirm Password” boxes. You can also add a password hint if you want it which will appear in case you forget the password.
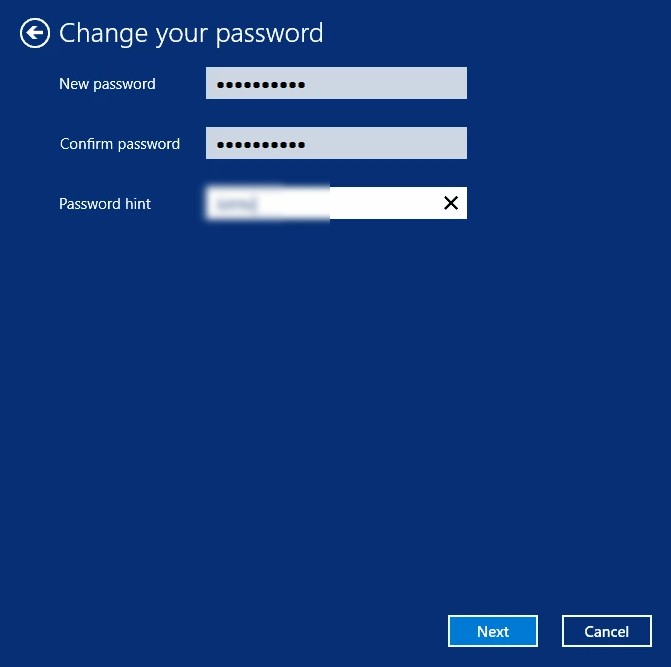
Step 5: Once you are done making the changes, click on the “Finish” button to finalize changing the password for the account.
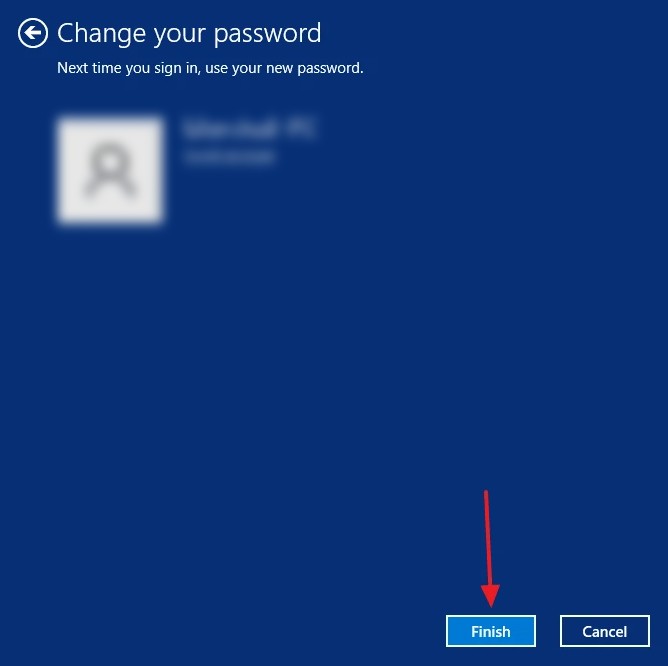
That’s it. You have now successfully changed the password for the local account on your Windows 11 computer. Now, when you restart the device, it will ask for the password and will only accept the newly registered password.
Make sure that your newly set password is relatively strong, having at least 8 to 10 characters in a combination of letters and numbers, including uppercase and lowercase as well as some special characters to make it stronger.
