Microsoft started rolling out the Nearby Sharing feature a couple of years back for the Windows 10 operating system and is also available in the latest Windows 11 OS. However, the feature isn’t enabled by default.
The Nearby Sharing feature enables users to share documents, photos, links to websites, and other content with other Windows devices close by over Bluetooth or Wi-Fi. It is similar to the AirDrop feature available for macOS and iOS devices.
The good thing is that you don’t need to pair the two PCs over Bluetooth to use this sharing feature. Both the devices just need to have Nearby Sharing enabled for file transfers to work.

In this step-by-step guide, we will show you how to enable the Nearby Sharing feature on your Windows 11 computer.
How to enable Nearby Sharing in Windows 11
Step 1: Open the Settings app on your Windows 11 computer. You can open it from the Start Menu or by pressing the Windows + I keys on your keyboard and selecting Settings from the context menu that appears.
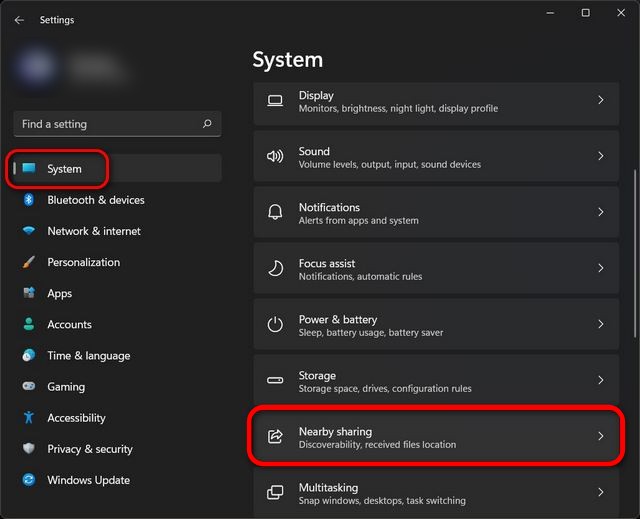
Step 2: Now, in the Settings window, click on the “System” from the left sidebar.

Step 3: In the System Settings page, click on the “Nearby Sharing” option.
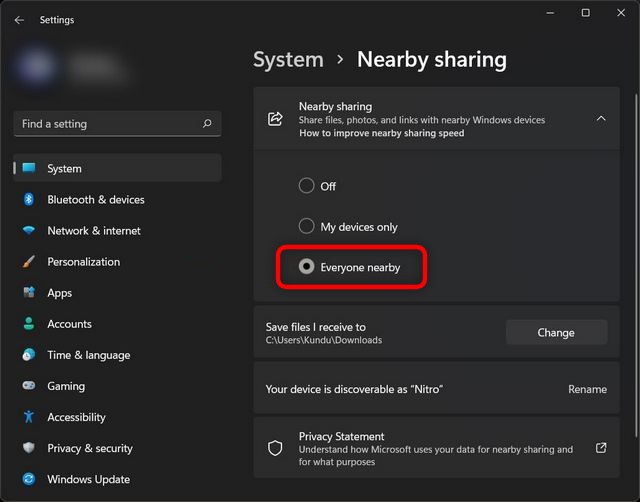
Step 4: Now, click on the “Everyone nearby” option under the Nearby sharing section to enable the feature.

That’s it. Once you have followed the above-mentioned steps, then the Nearby Sharing feature has been enabled on your computer.
Do note that to use the nearby sharing feature, both PCs — the one you’re sharing from and the one you’re sharing to — must have Bluetooth and must be running Windows 11 or Windows 10 version 1803 or later.

