Gamers and professional eSports players aim for the highest Frames Per Second (FPS) rate to get a competitive edge. If you are not aware, FPS is the rate at which your system completes the frame and the Hz mentioned for your monitor is related to the rate at which the display shows those completed screens.
Users generally rely on a third-party application or tools for checking out the FPS while playing games. While there is no issue with that, the Windows 10 operating system comes with an in-built tool for the same.
So, if you don’t want to install a third-party app on your device, then here is a step-by-step guide on how you can use the in-built feature of the Windows 10 OS to check the FPS rate while playing games.
How to check FPS rate of any game in Windows 10
Step 1: On your Windows 10 computer, press the Windows + G keys on the keyboard to open the Windows Game Bar.
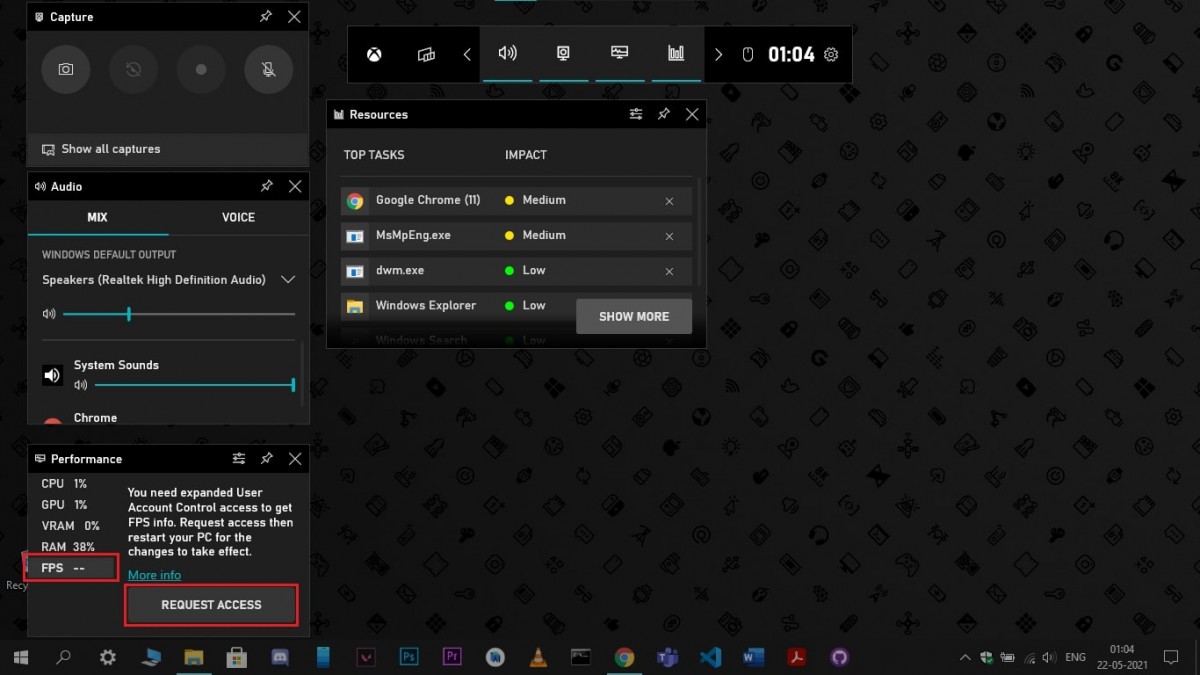
Step 2: When it opens, you will be able to see FPS under the Performance tab. Left-click on FPS and you will be prompted to restart your PC. There, click on the Request Access button and restart your device.
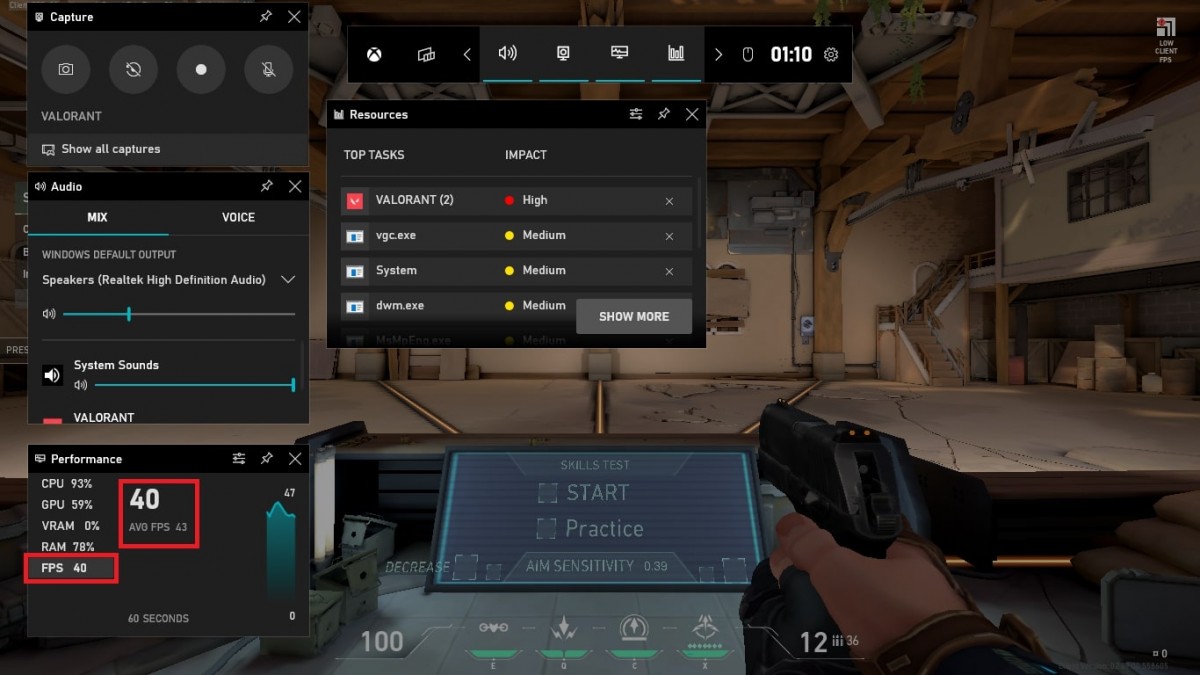
Step 3: Once your computer is restarted, start the game of your choice and then press the Windows + G keys. The game bar will now open up and you’ll be able to see the FPS under the Performance tab.


You can now drag the performance tab at any corner of your screen and then pin it. This performance tab will be pinned while the rest of the game bar will close automatically when you start playing the game.

