Microsoft is changing a lot in the latest Windows 11 operating system and is trying it make it more modern. The software is scheduled to roll out later this year but ahead of that, the Redmond-based tech giant has rolled out a preview version.
Offering a feature similar to what you get on your smartphone is the ability to check the screen on time on your laptop or computer. It is basically a measure of how long the screen was turned on after your device got a full charge.

In this step-by-step guide, we will show you how to check the screen on time on your Windows 11 computer.
How To Check Windows 11 Screen On Time?
A higher screen time means your battery can deliver more juice in a single charge. Before proceeding further, do note that the feature is only available for battery-powered devices, which includes laptops and tablets.
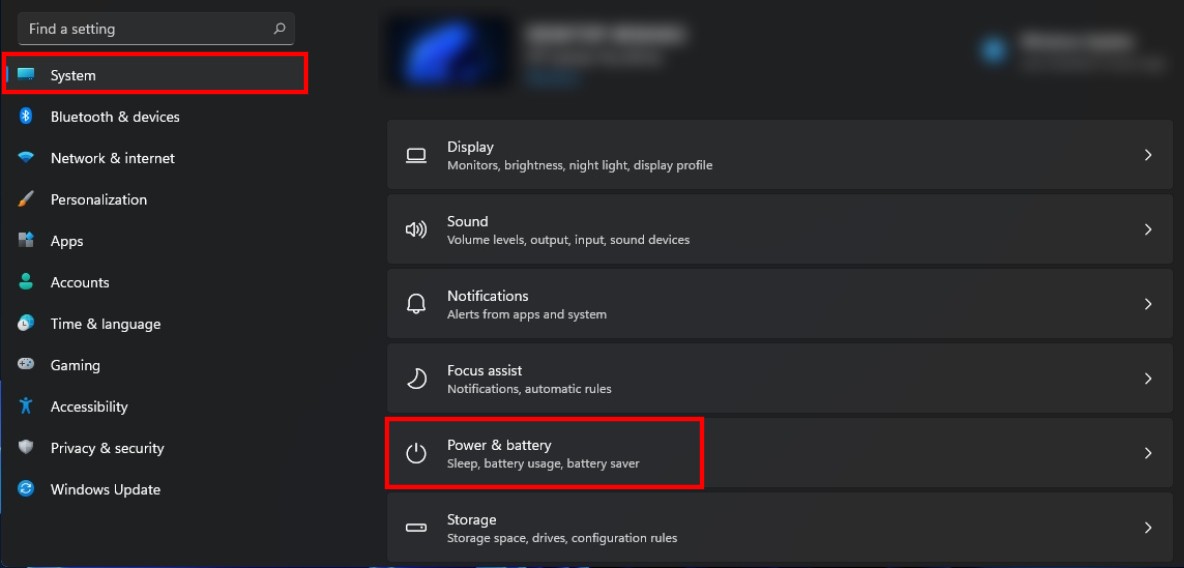
Step 1: Open the Settings application on your Windows 11 computer.
Step 2: Now, on the System page, click on the “Power & Battery” option.

Step 3: In the Power & Battery option, click on the “Battery Usage” drop-down menu.
That’s it. You can now check the Windows 11 battery stats, including the Screen On, Screen off, and Standby hours. The golden leaf on the bar graph indicates power-saving mode and the plug icon indicates when the charger was connected to the system.

