With the iOS 14 update for iPhones, Apple also updated the Maps application with support for cycling directions, a feature that is already available in Google Maps for some time.
But, Apple is going a step further by including features that guides users with bike lanes or side roads on the route, a toggle to avoid busy roads or hills, and more.
In this guide, we will show you a step-by-step procedure on how to use the Apple Maps cycling directions in iOS 14.

Using detailed cycling directions in Apple Maps
Step 1: First of all, open the Apple Maps on your iPhone.
Step 2: In the Apple Maps app, use the search bar to look for directions.
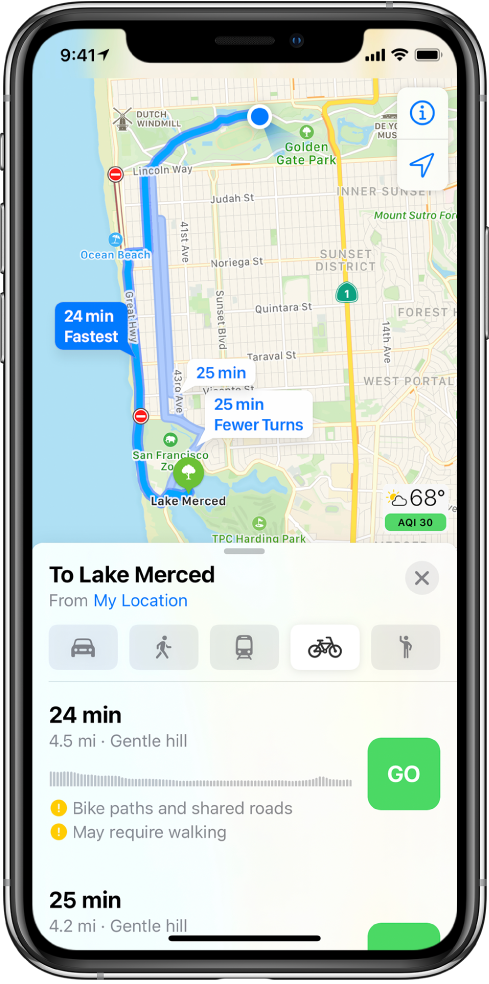
Step 3: Now, tap the new bicycle icon to change the route type. If cycling directions are available, you’ll see an elevation overview for the ride along with distance and estimated travel time.

Step 4: Tap the elevation graph/time estimate to see the route details before you start the guidance.
Step 5: You can now tap the “Go” button when you are ready to start.
Do note that the Apple Maps cycling directions is not available in all areas. It is already available in the Bay Area, Los Angeles, San Diego, Portland, and New York City. The company is now working on rolling it out for more regions.
