Microsoft Word documents are usually accompanied by tons of Flowcharts, Images, Cliparts, and more which generally increase the file size of the document. Due to this, there are moments when these documents eat up too much space on the hard drives and are often rejected by email services due to their bigger file size.
Hence, to solve these problems compressing the attached images in the document becomes important. As of now, this operation can only be done on a Windows PC or a Mac as Microsoft Word on mobile devices doesn’t support this feature yet.

How to Compress Images in Microsoft Word
Step 1: Open the Microsoft Word document in which you want to compress the images.
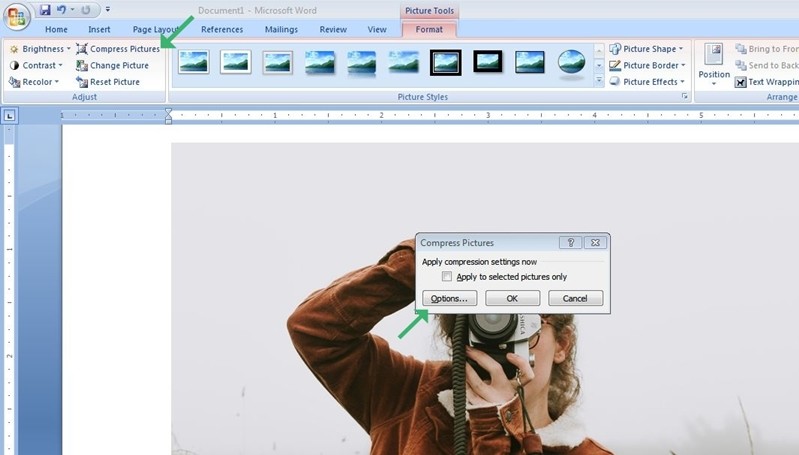
Step 2: Select the picture from the Word document and head to the “Format” section.
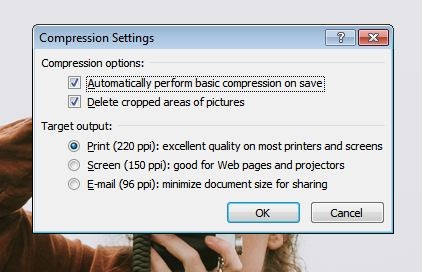
Step 3: Click on “Compress Pictures” and then select options to bring up the advance settings.

Step 4: Select your preferred output quality and click on “OK” to apply your changes. That’s all doing this will compress your selected image. It is to be noted that compressing an image affects the image quality so if you want to print something make sure you don’t compress it much.

This same method can be followed to compress images on Microsoft Word on Mac. The newer version of Microsoft Word also comes with an HD (330 PPI) option that users can select if they want to make the images good enough to be viewed on High-Definition Displays.
Read Next:
