A Wi-Fi device is an essential component of your Windows 11 PC, but sometimes you may need to disable it for various reasons. If you are planning to disable Wi-Fi on Windows 11, there are probably 4 different ways that we found which will help you out. Take a look.

1) Using The Wi-Fi Switch In The System Tray
The easiest way to disable Wi-Fi on Windows 11 is to use the Wi-Fi switch provided. Click on the Wi-Fi or network icon (or globe) in the system tray and click on the Wi-Fi button to disable/enable Wi-Fi on your Windows device.
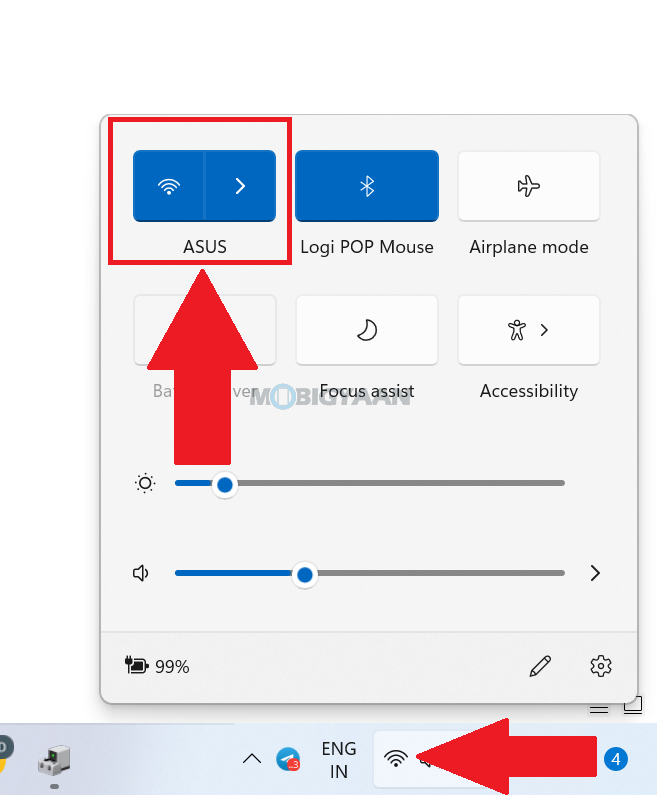
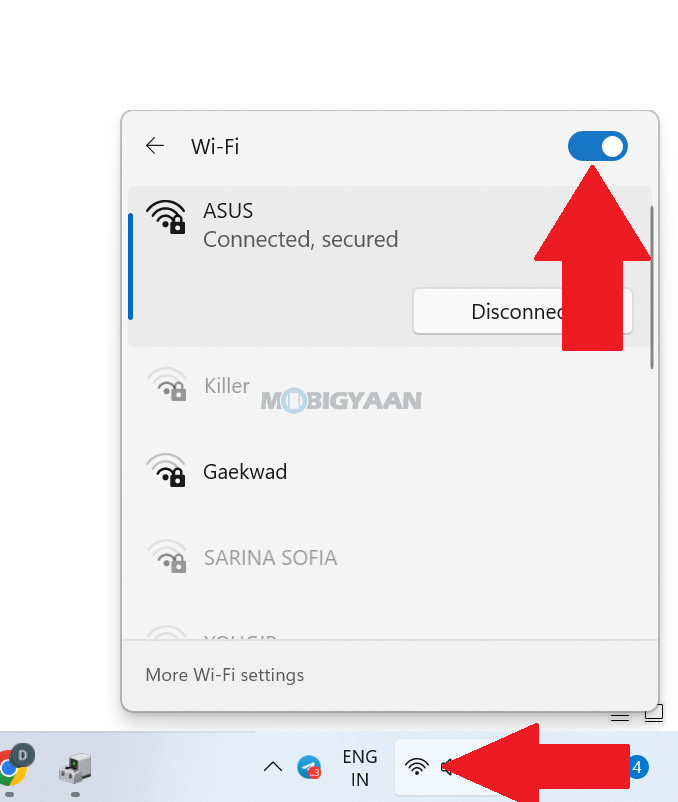
2) Using The Wi-Fi Settings
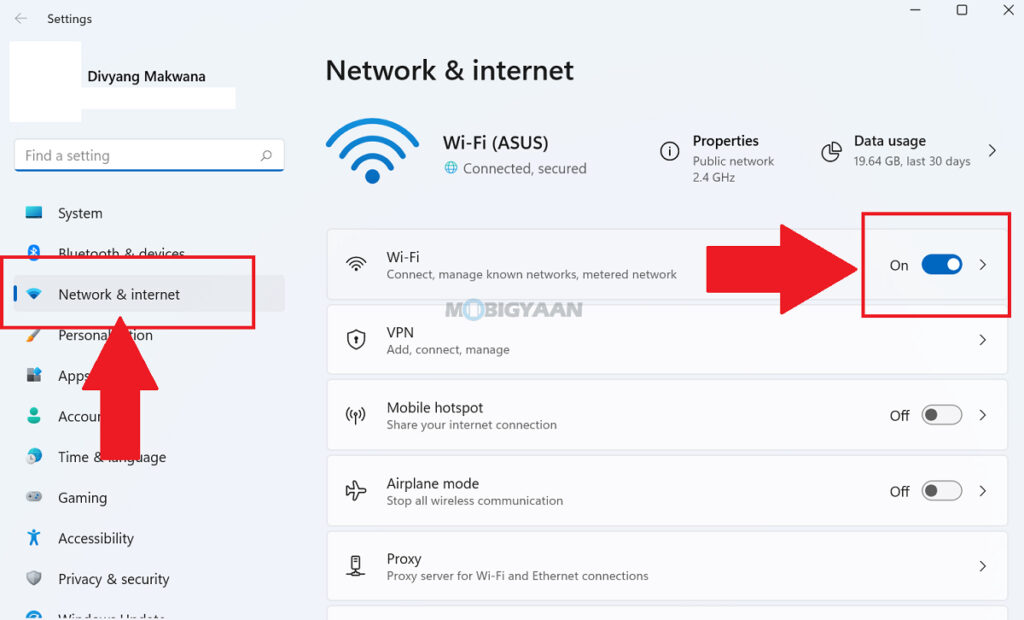
Aside from using the Wi-Fi button shortcut, you can also use the Wi-Fi settings to disable Wi-Fi on Windows 11, just follow these easy steps.
- Step 1: Open Settings on your Windows 11 PC by using the keyboard shortcut Windows Key + I.
- Step 2: Select Network & internet on the left and click the Wi-Fi slider switch on the right.
You can also right-click on the network icon in the system tray and click Network and Internet settings to enter Wi-Fi settings. From here, you can disable Wi-Fi on Windows 11 using the slider.
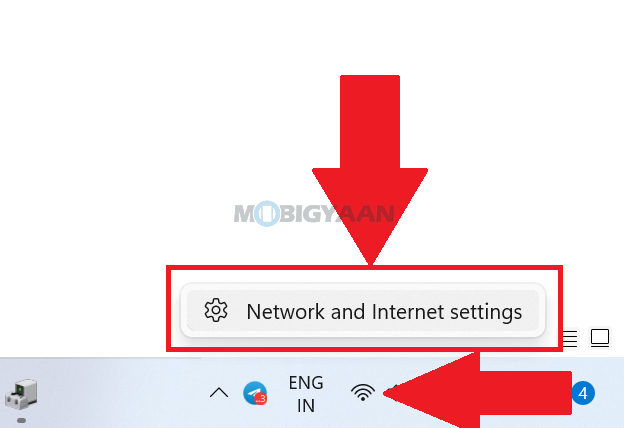
Please note that disabling the Wi-Fi using the Network Flyout will only disconnect the device from the network. You can completely disable the Wi-Fi using the below two methods.
3) Using Network Adapters
Another way to disable Wi-Fi on Windows 11 is to disable the Wi-Fi adapter which will completely disable the Wi-Fi. You won’t be able to use the switch anymore, you will need to re-enable the adapter in order to use the Wi-Fi again.
- Step 1: Open Settings on your Windows 11 PC by using the keyboard shortcut Windows Key + I.
- Step 2: Select Network & internet on the left and click Advanced network settings on the right.
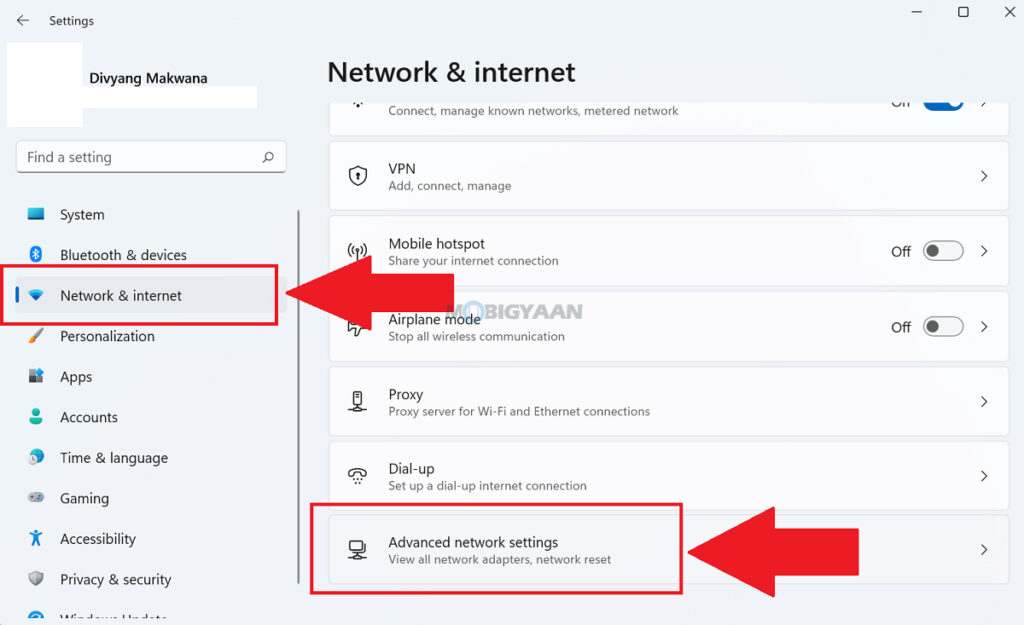
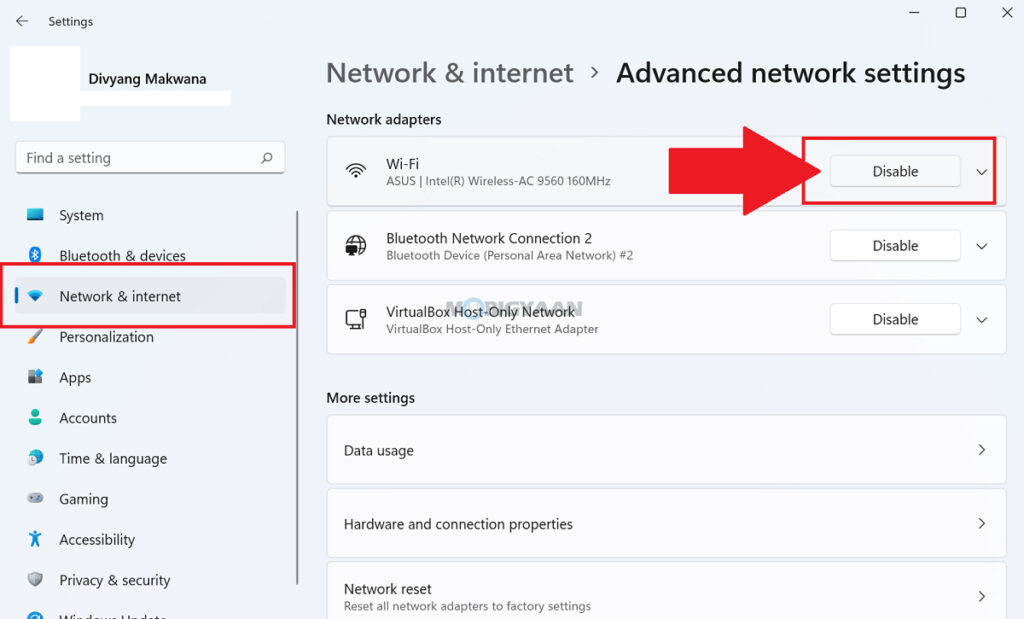
- Step 3: Here, you will see network adapters available on your computer, click on the Disable button next to the Wi-Fi adapter.
Note: The Wi-Fi switch won’t be visible after you disable the Wi-Fi adapter. In case you just want to disable Wi-Fi on Windows 11 using the switch in the tray, do not disable the Wi-Fi adapter using this method.
4) Using Device Manager
The last thing you want to do is to use the Device Manager to disable Wi-Fi on Windows 11. By using this method, you won’t be able to turn on/off Wi-Fi since the Wi-Fi device has been disabled in the Device Manager.
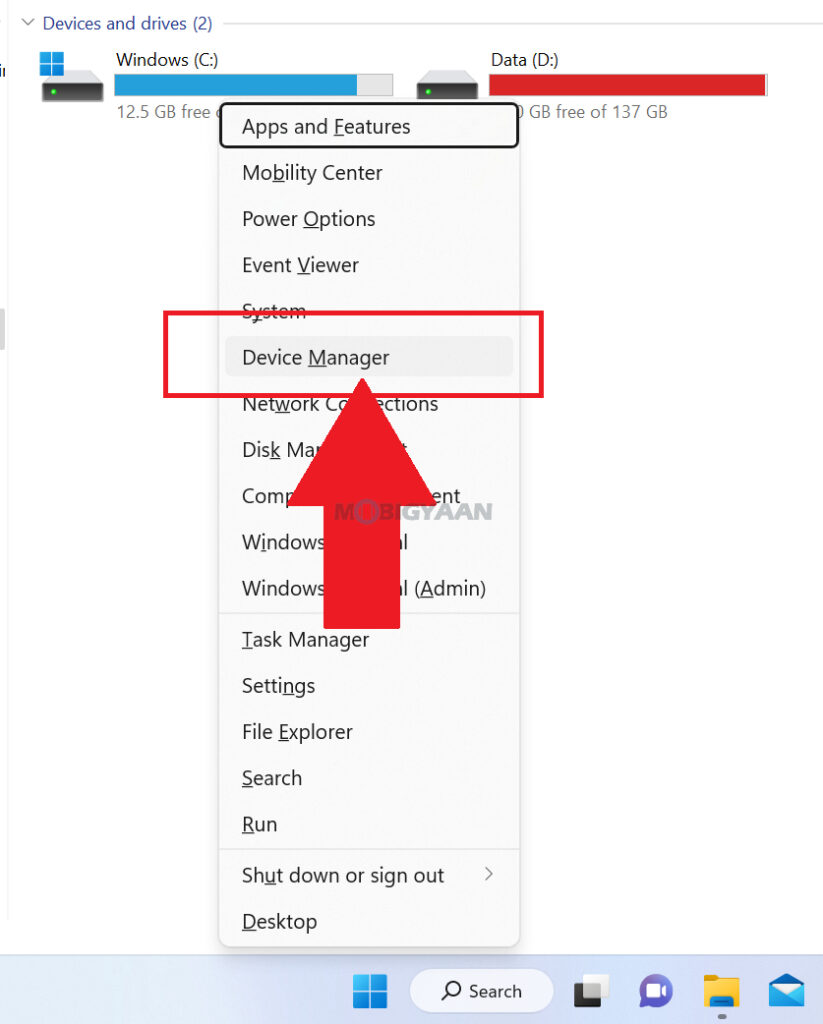
- Step 1: Launch the Device Manager using the Windows Power Menu, press the Windows Key + X to open the Power Menu, and choose Device Manager from the list.
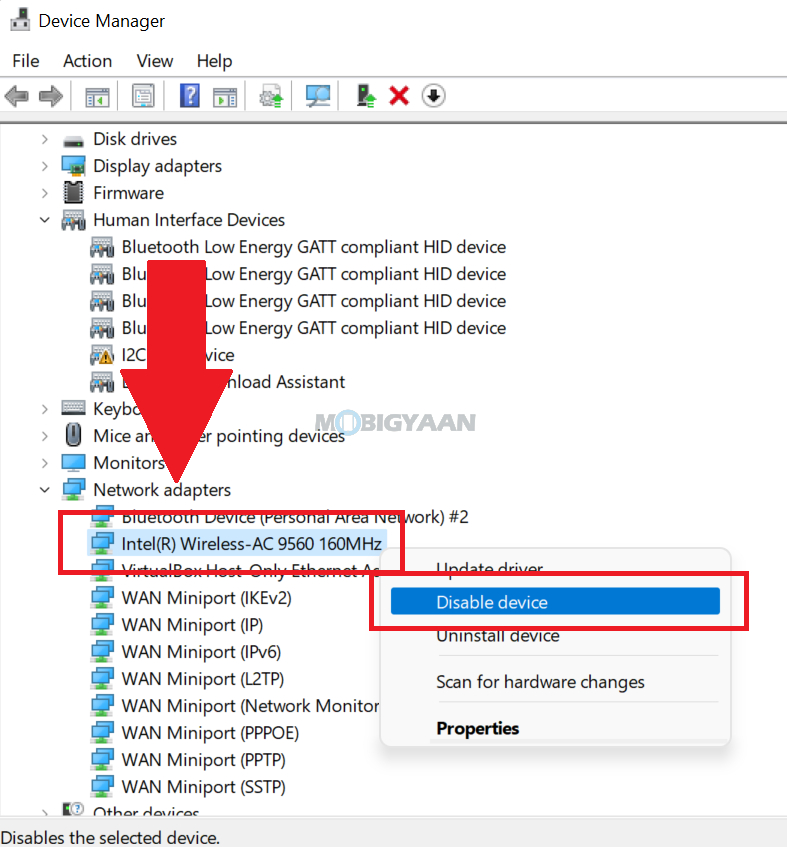
- Step 2: Double-click on Network adapters to open the devices list and find your Wi-Fi adapter. In our case, it’s Intel(R) Wireless-AC 9560 160MHz.
- Step 3: Right-click on the Wi-Fi adapter and click on Disable.
Now you have completely disabled the Wi-Fi on your Windows 11 PC. If you just want to disable Wi-Fi using the switch in the tray, don’t disable it in the Device Manager. If you did, you can simply re-enable it using the above method.
That’s all for now. You can head to our How-To Guides section for more about Windows stuff. Here are some useful Windows 11 tips and tricks for you.
Suggested Windows 11 guides:
- 6 Ways To Launch Windows Terminal In Windows 11
- 3 Ways To Mount An ISO Image in Windows 11
- 5 Ways To Select Text Faster On Your PC [Windows 11]
- 3 ways to turn off OneDrive on Windows 11
To get updates on the latest tech news, smartphones, and gadgets, make sure you follow us on our social media profiles.

