There are a bunch of Windows 11 tips and tricks that you can make use of to speed up your tasks as well as do more with your computer in an efficient way. Here are some of the useful and handy Windows 11 tips and tricks and quick workarounds that will help you to make things easier for you.
1) Trim Videos Without Installing Any Apps
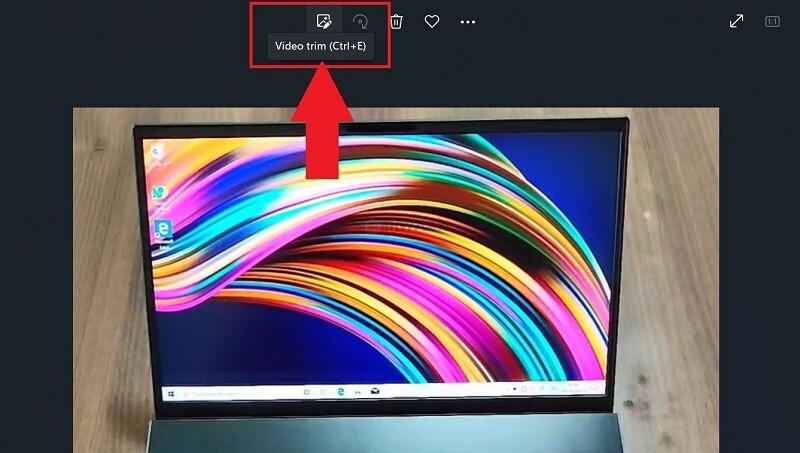
You can trim the videos and resize the duration in Windows 11 without the need for any extra tools, you get this built-in Windows tool, here’s how you can trim a video in Windows 11. The Photos app is generally used for opening photos and playing videos, but it can also be used to trim videos that you play in it. Use the Trim button to edit videos.
- Step 1: Right-click on the video that you want to trim and choose Open With -> Photos from the right-click menu.
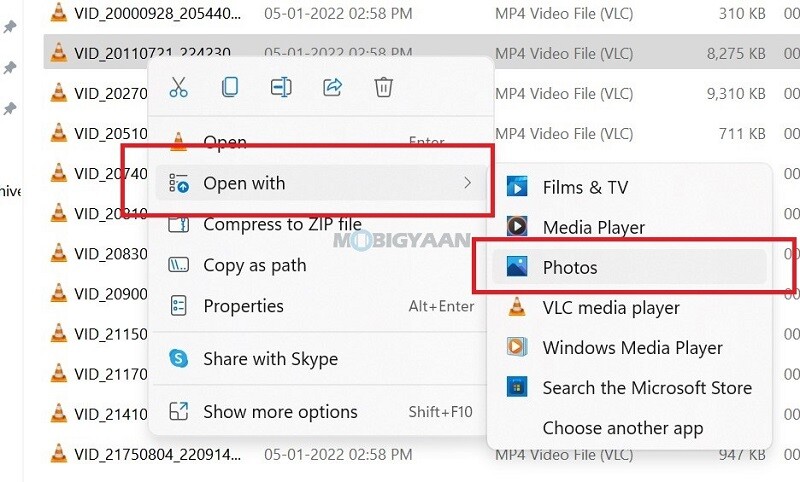
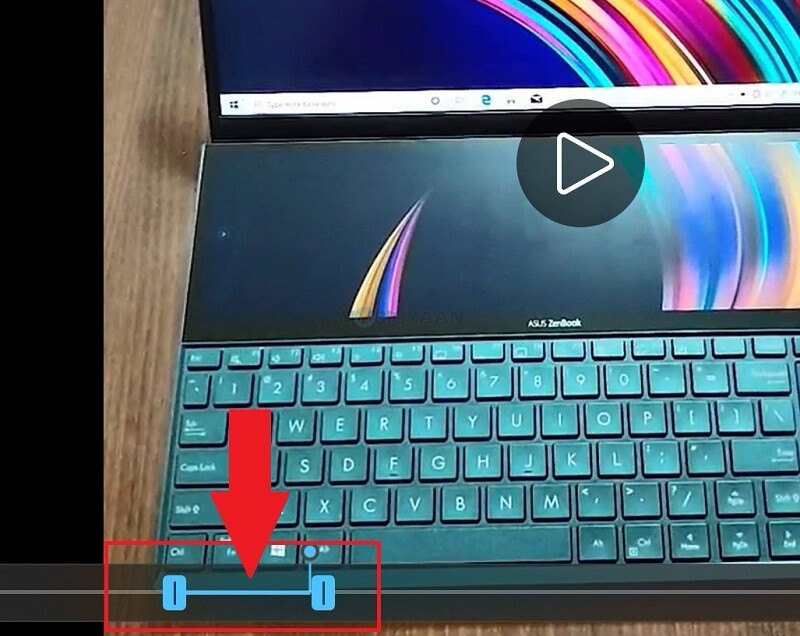
- Step 2: Once the video file opens, find the trim button at the top as you can see in the screenshot below. Click on it and adjust the slider according to your trimming requirements. Click on Save As in the top right corner.
2) Find MAC Address of your computer
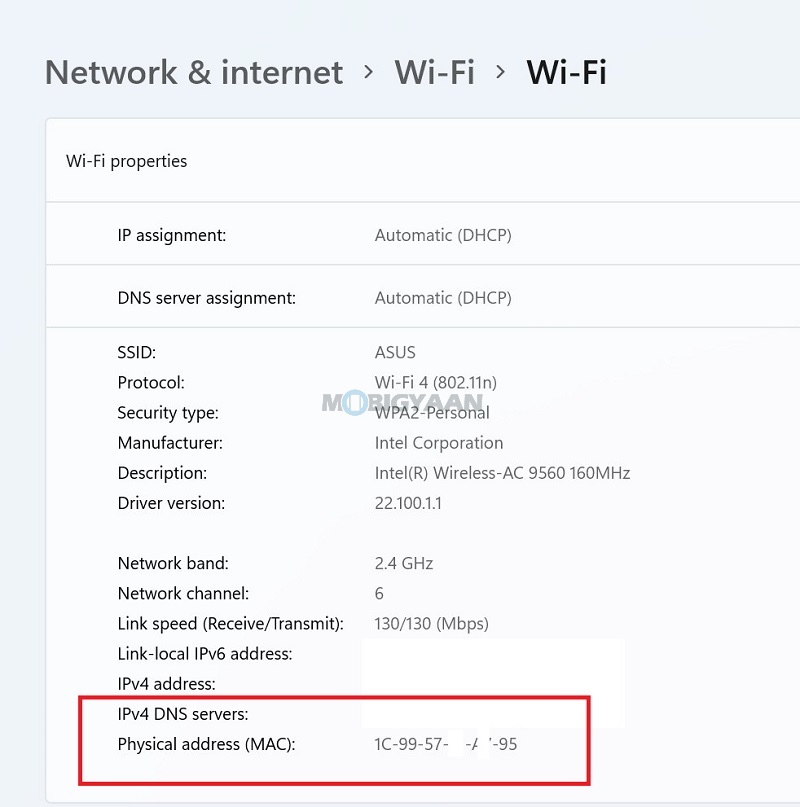
MAC (Media Access Control) address is a unique device identifier assigned by device manufacturers to different network adapters. Wi-Fi, Ethernet/LAN, and other network devices contain a MAC address. If you are looking for a MAC address of your Wi-Fi, Windows 11 has some easy options for you. Here they are.
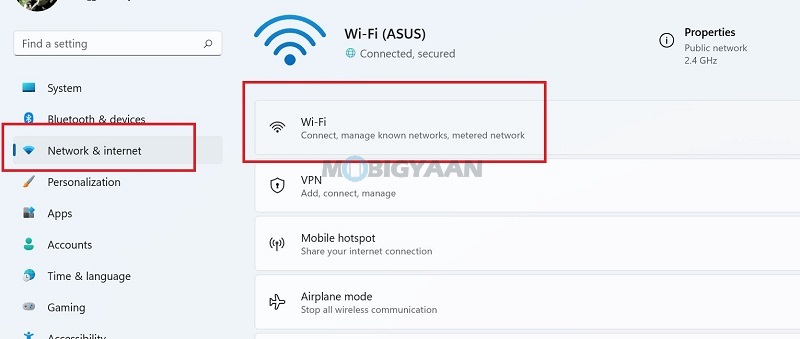
- Step 1: Launch Settings of your Windows 11 (Windows Key + I) and click on Network & internet.
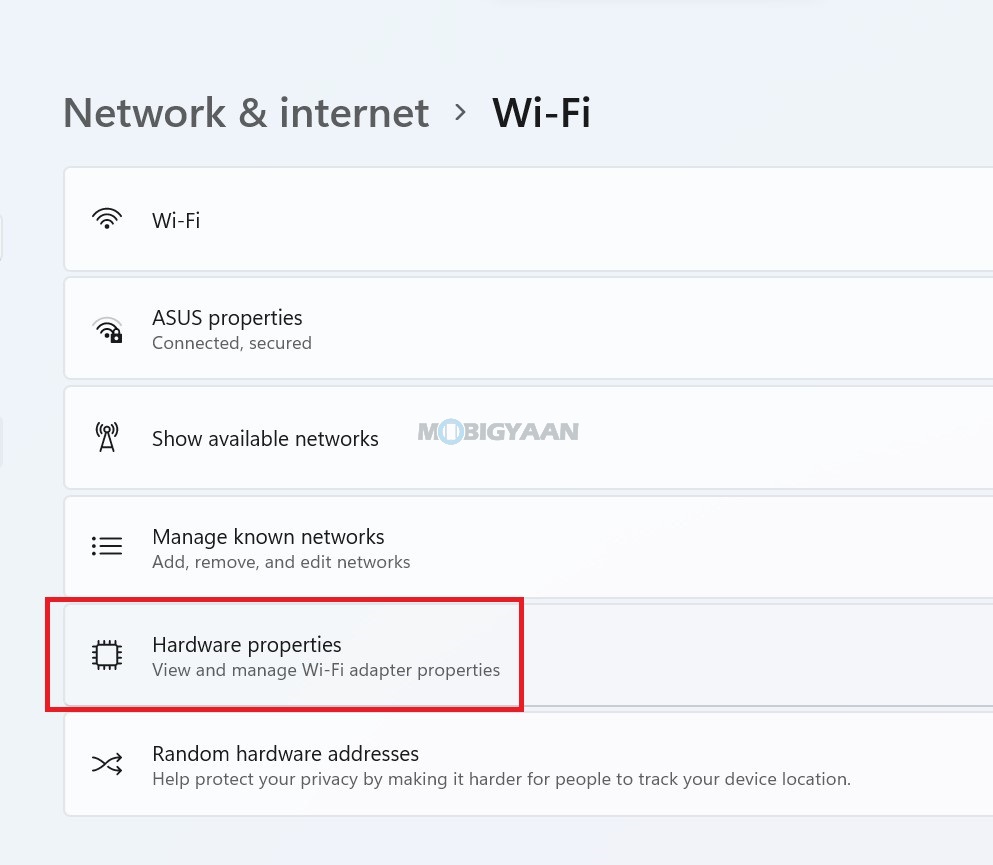
- Step 2: Click on Wi-Fi and then Hardware properties. You can now see the MAC address in this window.
Another way to check your computer’s MAC address is to use PowerShell or Command Prompt.
- Step 1: Press Windows Key + X or right-click on the Start menu, and choose Terminal to launch the PowerShell.
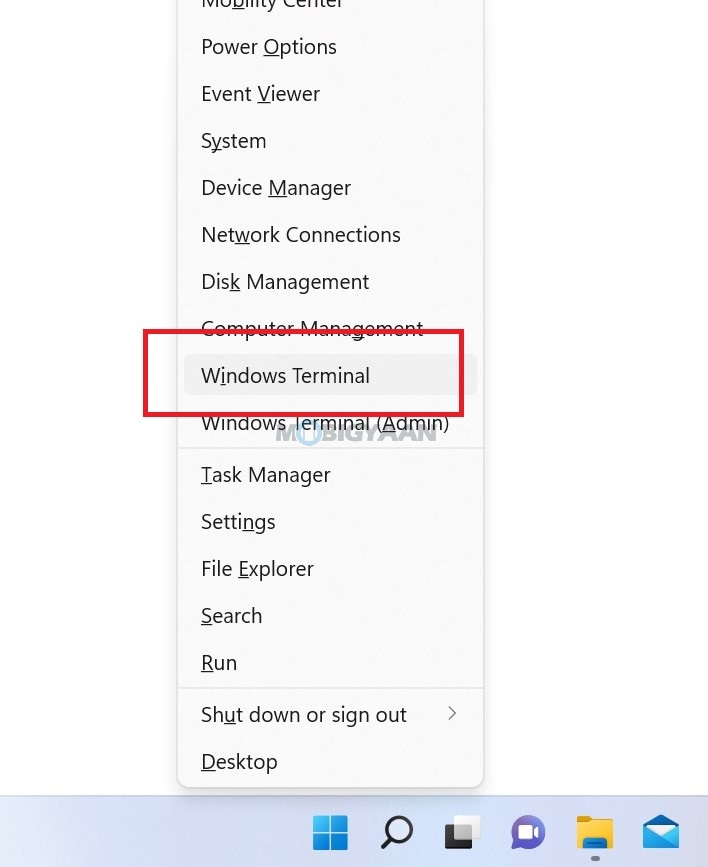
- Step 2: Type in the following command getmac /v and press Enter. Here, you will be able to see the MAC address.
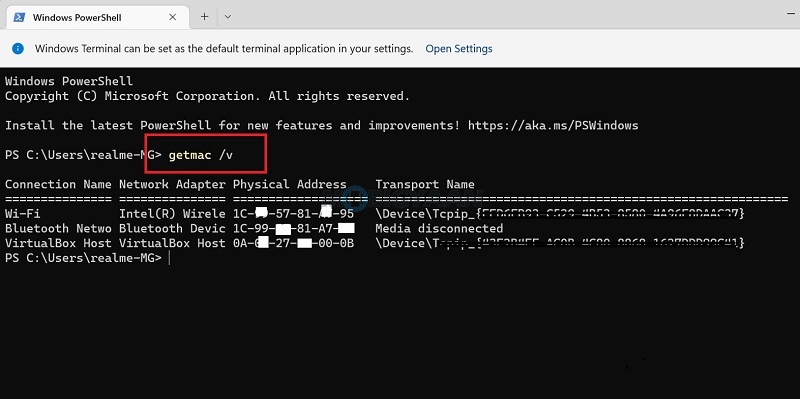
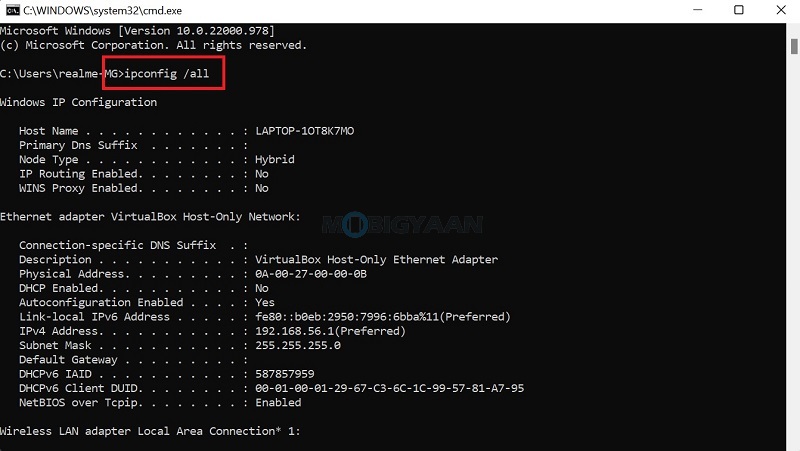
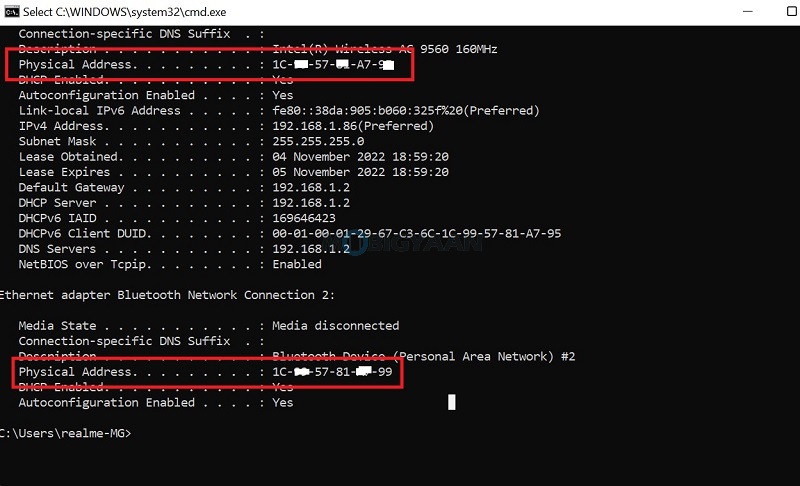
Launch Command Prompt using the Windows Key + R and type CMD. You can also search the start menu for cmd. Type in the following command ipconfig /all and hit Enter to see the MAC address.
3) Disable Clipboard History
Your Windows 11 PC saves clipboard history by default and if you are concerned about your privacy or maybe you are on a shared PC and don’t want your clipboards to be seen, you can simply disable them. Here’s how you can prevent Windows 11 from saving your clipboard history.
- Step 1: Launch Windows 11 Settings using the Windows Key + I keyboard shortcut.
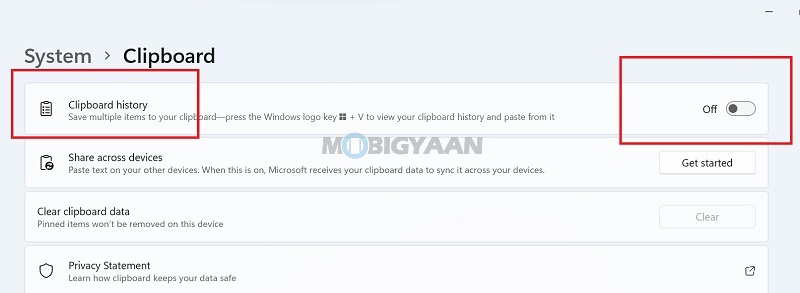
- Step 2: Under System, click on the Clipboard option.
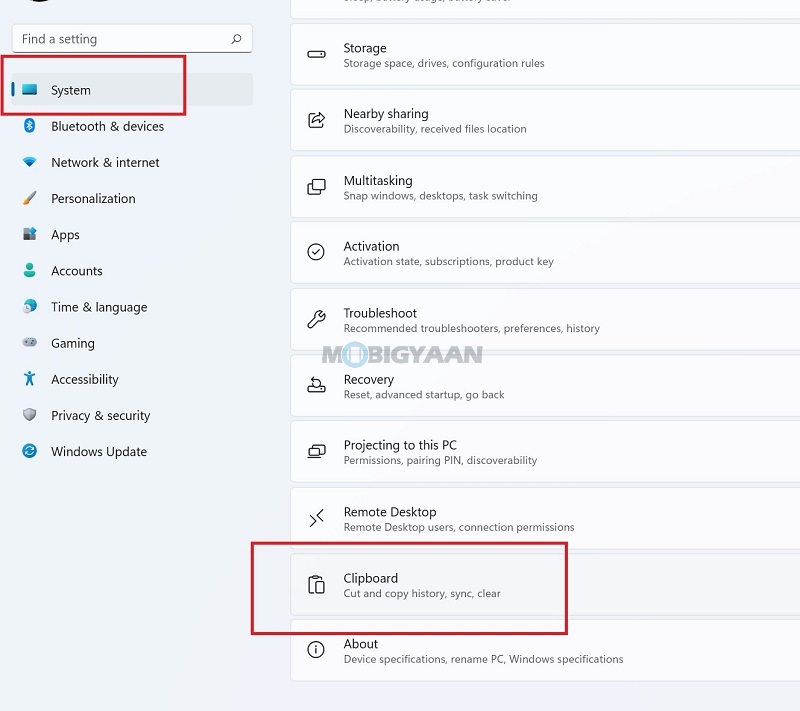
- Step 3: All you need to do is disable the slider Clipboard history and Windows 11 won’t record any clipboards from now on.
Do note that, you will be able to use the most recently copied item and not the items copied before that.
4) Set Default Tabs In Task Manager
Task Manager is great for killing tasks, viewing system usage, or managing users and startup items. If you are using it more often and find switching tabs being an extra step, you might want to set the default tab. Here’s how you can do it.
- Step 1: Launch the Task Manager by pressing the CTRL + ALT + DEL (or CTRL + Shift + Esc).
- Step 2: Click on More Details at the bottom.
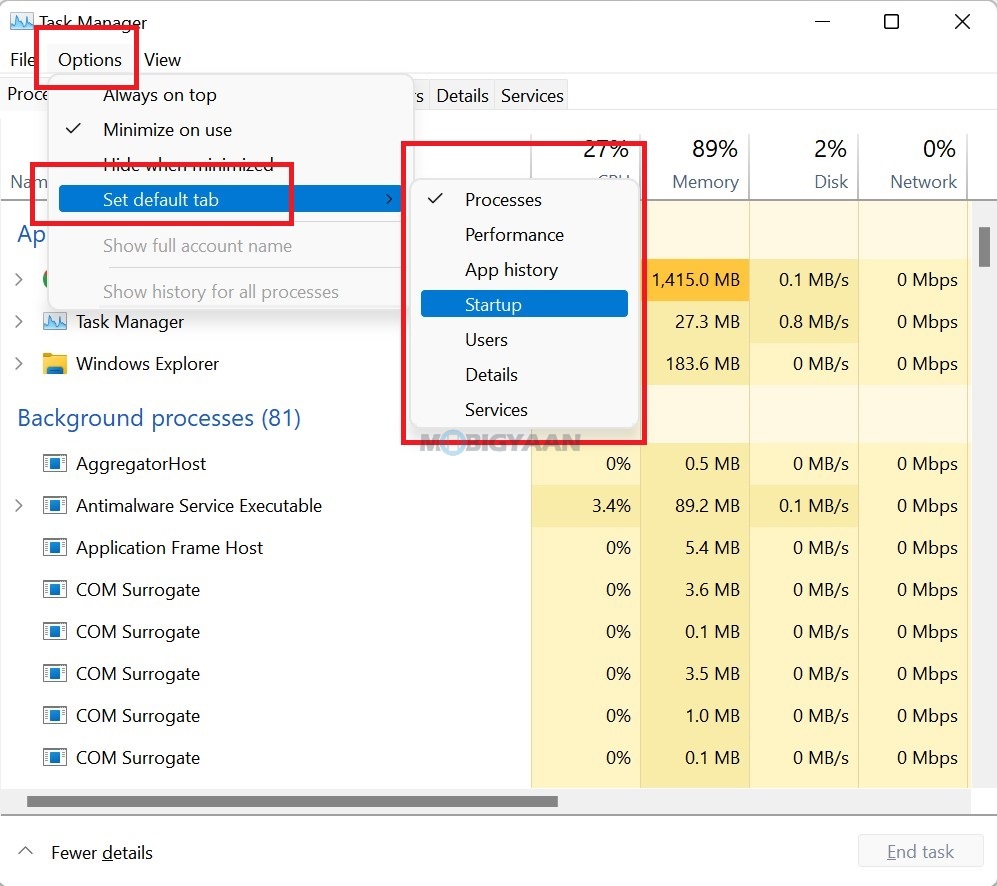
- Step 3: Click on Options in the menu bar and go to Set default tab, choose the tab you want to open by default when you launch Task Manager.
You can change to any other tab you wish to show at first when you launch the Task Manager.
5) Set A Default Audio Device
Are you connected to a discrete audio device or a home theatre system on your Windows 11 PC? You might want to change the audio device to either external speakers, onboard speakers, headphones, or any other. It’s easy to switch to the different audio outputs, and you can set them as default if you prefer one of them. Here’s how.
- Step 1: Launch Windows 11 Settings using the shortcut Windows Key + I.
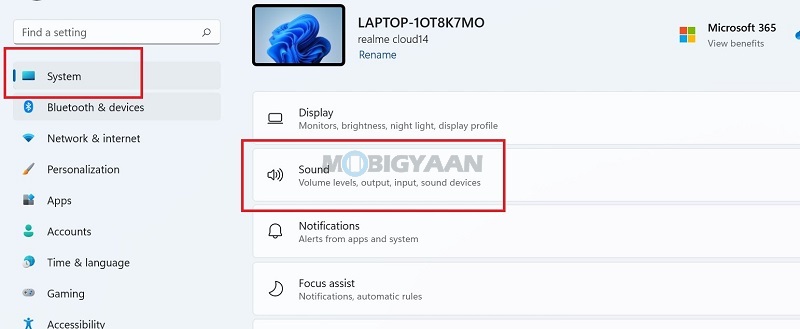
- Step 2: Go to System on the left and choose Sound on the right.
- Step 3: Click on the drop-down menu next to the Set as default sound device option and select the default audio output for your PC.

6) Turn On Auto-Brightness Feature
If you are using a Windows 11 laptop, you might want to keep the brightness set to auto. Many Windows laptops are already enabled with an auto-brightness feature (if the ambient sensor is present on the device), but if you think your laptop needs an auto-adjustment of the brightness, here’s what you can do.
- Step 1: Launch Windows 11 Settings using the shortcut Windows Key + I.
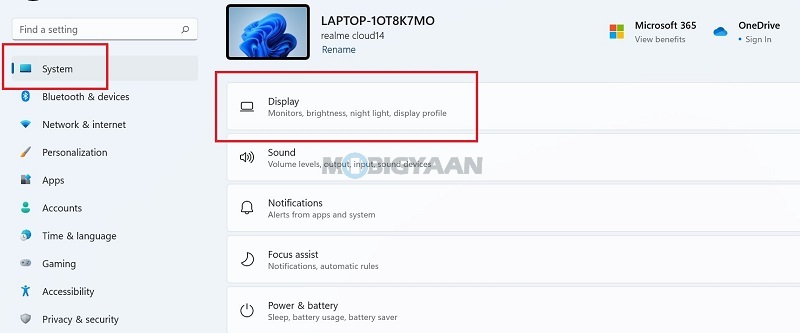
- Step 2: Go to System on the left and choose Display on the right.
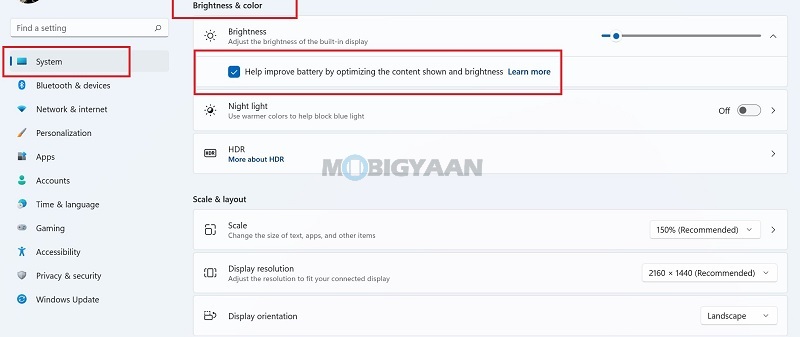
- Step 3: Click on Brightness under Brightness & color tab.
- Step 4: Check the box Change brightness automatically when lighting changes option or Help improve battery by optimizing the content shown and brightness.
7) Change Windows account password [Command Prompt]
It’s easy to change your Windows account password with a single CMD command, no need to navigate into the User Account Settings. With admin access, you can change the passwords of your own account as well as the password of the accounts of others available on your Windows 11 PC.
To change the Windows user account password using Command Prompt, here is what you need to do, follow these simple steps.
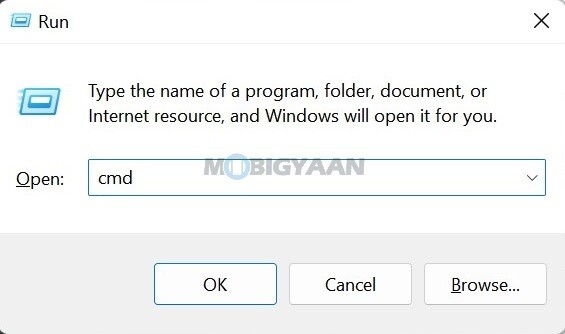
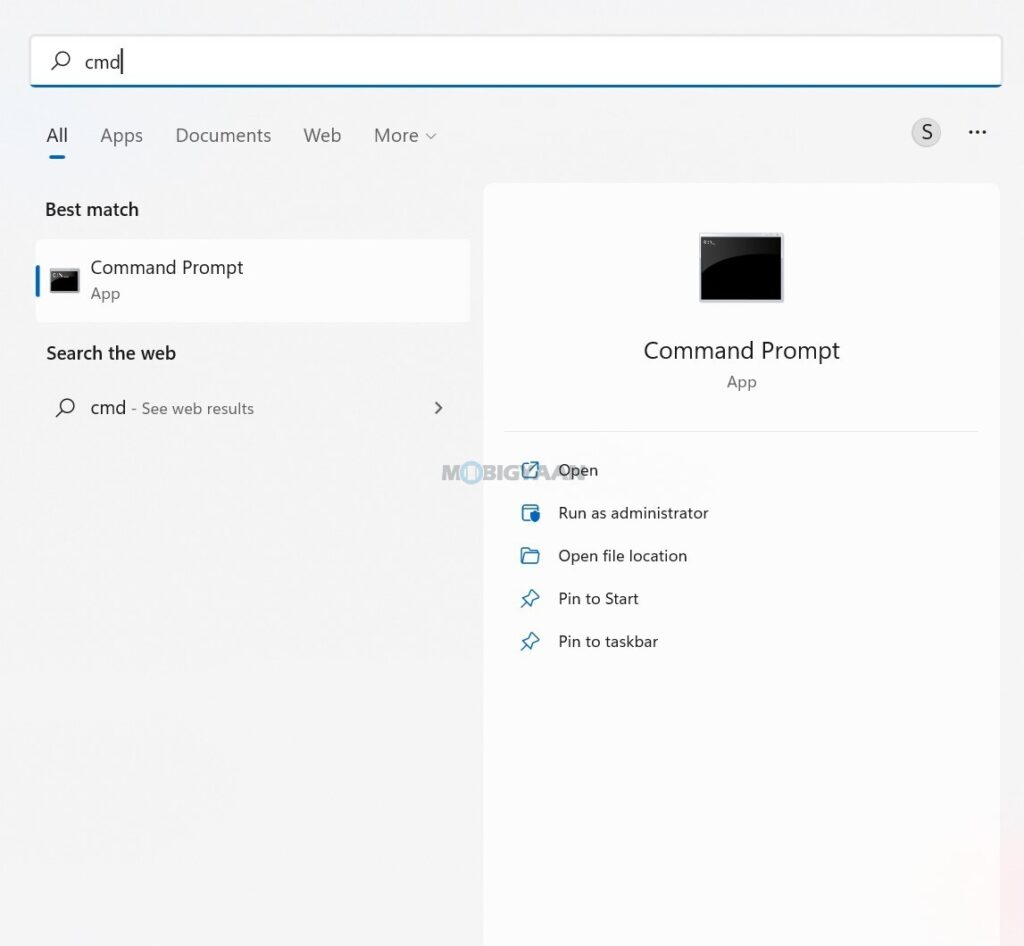
- Step 1: Launch the Command Prompt using the Windows Key + R shortcut and type in cmd and then press CTRL + SHIFT + ENTER. You can also go to the Start Menu and search cmd, right-click on it and select Run as Administrator.
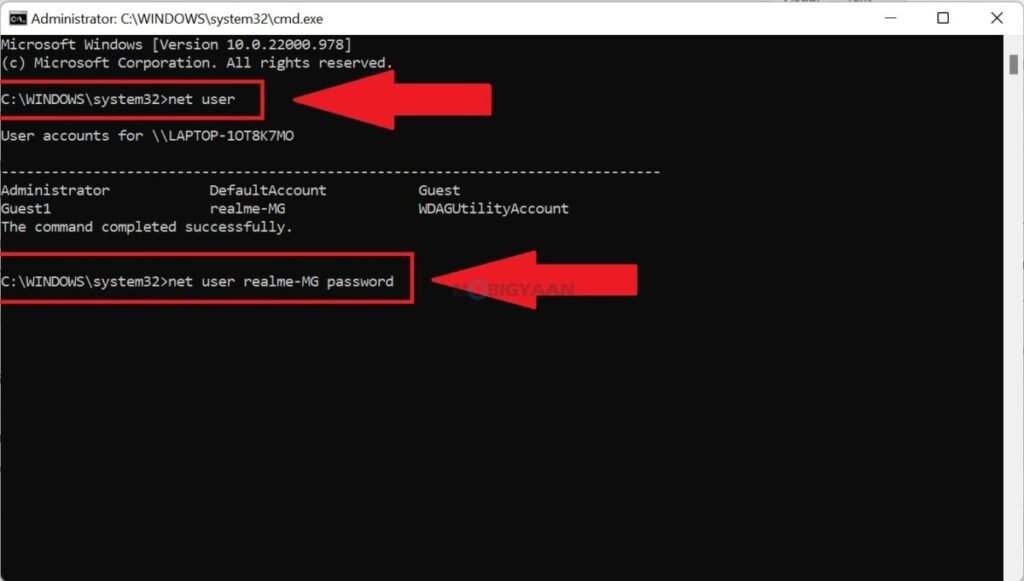
- Step 2: A CMD window will open, now type in the command net user USERNAME PASSWORD and it Enter. Replace the USERNAME with the username whose password you want to change and PASSWORD with the new password you want to use.
Just type this command net user in Command Prompt to get a list of users available on PC. If the username has spaces, make sure to enclose it with double quotes.
For instance,
- net user “MobiGyaan MG” PASSWORD
You should also note that this command will only let you change your local account password and not the Microsoft account. If you are using a Microsoft account to log into your PC, there’s a different procedure to change the passwords.
8) Check Graphics Card VRAM usage in Windows 11
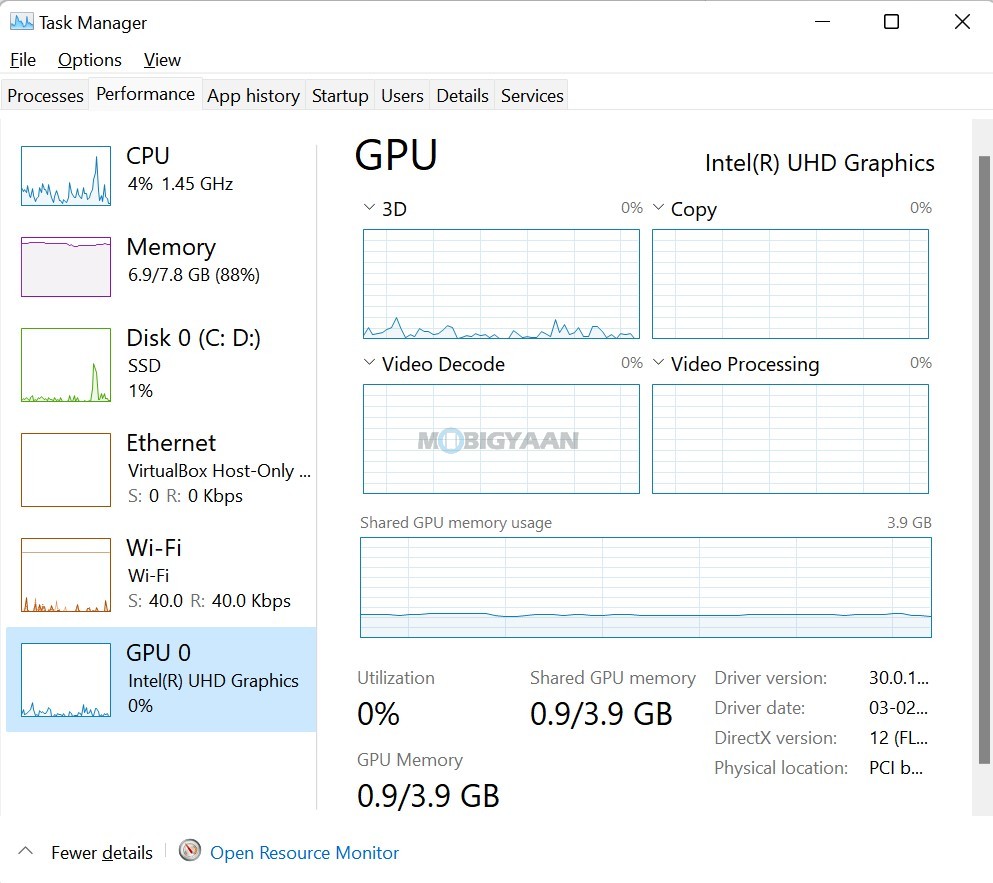
Want to check how much VRAM of your Graphics Card is been used while playing games or while using apps like Photoshop? The Task Manager can show you some basic information regarding your GPU which includes the VRAM usage as well as GPU utilization in percentage.
- Step 1: Minimize the app or PC game that you are playing, use the ALT + TAB key to switch to the desktop, and launch the Task Manager.
- Step 2: Click on the Performance tab once you are on the More Details view of the Task Manager.
- Step 3: Once you are in on the Performance tab, you will be able to see the GPU usage data. Click on the GPU to see details about your GPU usage.
If you have multiple GPUs on your system (usually onboard + discrete), you can view the details of each GPU detail, they can be listed as GPU 0, GPU 1, and so on.
These are some of the top useful and handy Windows 11 tips and tricks that will help you make things easier in your daily activities. Like this content? Want more of such stuff on Windows 11? Head to our How-To Guides.
To get updates on the latest tech news, smartphones, and gadgets, make sure you follow us on our social media profiles.

